TheUltimate3 (talk | contribs) (Revert if needed, but I didn't think his entire name was needed for this) |
1-of-DaBoys (talk | contribs) Tag: Visual edit |
||
| (143 intermediate revisions by 40 users not shown) | |||
| Line 1: | Line 1: | ||
{{Conjecture}} |
{{Conjecture}} |
||
{{Event infobox |
{{Event infobox |
||
| − | |image = [[File:Article-0-0B08D358000005DC-888_634x423.jpg|250px]] |
||
|name = Horcrux hunt |
|name = Horcrux hunt |
||
| + | |image = Tent PM.png |
||
| − | |location = Around [[Great Britain]] |
||
| + | |location = [[Great Britain]] |
||
| − | |date = [[July]] [[1996]] - [[May]] [[1998]] |
||
| + | |date = [[July]] [[1996]] – [[2 May]] [[1998]] |
||
|participants = *[[Albus Dumbledore]] † |
|participants = *[[Albus Dumbledore]] † |
||
*[[Harry Potter]] |
*[[Harry Potter]] |
||
| Line 11: | Line 11: | ||
*[[Griphook]] † |
*[[Griphook]] † |
||
|description = The mission given to Harry Potter to find and destroy [[Tom Riddle|Lord Voldemort]]'s [[Horcrux]]es |
|description = The mission given to Harry Potter to find and destroy [[Tom Riddle|Lord Voldemort]]'s [[Horcrux]]es |
||
| − | |first = [[Harry Potter and the Half-Blood Prince]] |
||
| − | |last = [[Harry Potter and the Deathly Hallows]] |
||
| − | |cause = If all horcruxes were destroyed, [[Harry Potter|one]] destroys [[Voldemort]]. |
||
}} |
}} |
||
| + | {{Quote|There are no more Horcruxes. It's just you and me. Neither can live while the other survives, and one of us is about to leave for good...|Harry Potter to Voldemort regarding the destruction of all the Horcruxes|Harry Potter and the Deathly Hallows}} |
||
| + | The '''Horcrux hunt''' was a mission started by [[Albus Dumbledore]] and given to [[Harry Potter]] in [[June]] of [[1997]] to find all of [[Tom Riddle|Lord Voldemort]]'s remaining [[Horcrux]]es and destroy them. Albus Dumbledore began this quest in [[July]] of [[1996]] when he sought out and destroyed [[Marvolo Gaunt's Ring]] located in the [[Gaunt Shack|Gaunt shack]]. After his death at the hands of [[Severus Snape]] during the [[Battle of the Astronomy Tower]], the mission fell to Harry Potter to complete. |
||
| + | Harry was joined by [[Hermione Granger]] and [[Ronald Weasley|Ron Weasley]], and they set off in the [[Attack at The Burrow|aftermath]] of [[William Weasley|Bill Weasley]] and [[Fleur Delacour]]'s [[Wedding of William Weasley and Fleur Delacour|wedding]]. The hunt was difficult and took a mental and emotional toll on the trio. They eventually destroyed all of the Horcruxes by [[2 May]] [[1998]]. The hunt ended with the [[Voldemort's Last Stand|death]] of Lord Voldemort at the hands of Harry Potter at the end of the [[Battle of Hogwarts]]. |
||
| − | {{Quote|There are no more Horcruxes. It's just you and me. Neither can live while the other survives, and one of us is about to leave for good...|[[Harry Potter]] to [[Tom Riddle|Lord Voldemort]]|Harry Potter and the Deathly Hallows}} |
||
| + | ==History== |
||
| − | The '''Horcrux hunt''' was a mission started by [[Albus Dumbledore]] and given to [[Harry Potter]] in [[June]] of [[1997]] to find all of [[Tom Riddle|Lord Voldemort's]] remaining [[Horcrux]]es and destroy them. Albus Dumbledore began this quest in [[July]] of [[1996]] when he sought out and destroyed [[Marvolo Gaunt's Ring]] in the [[Gaunt shack]]. After his death at the hands of [[Severus Snape]] during the [[Battle of the Astronomy Tower]], the mission fell to Harry Potter to complete. He was joined by [[Hermione Granger]] and [[Ronald Weasley|Ron Weasley]], and they set off in the aftermath of [[William Weasley|Bill Weasley]] and [[Fleur Delacour]]'s [[Wedding of William Weasley and Fleur Delacour|wedding]]. They eventually destroyed all of the Horcruxes by [[2 May]] [[1998]]. The hunt ended with the death of Lord Voldemort at the hands of Harry Potter at the end of the [[Battle of Hogwarts]]. |
||
| + | ===Background information=== |
||
| + | ====Creation of the Horcruxes==== |
||
| + | {{Quote|Sir, I wondered what you know about... about Horcruxes?|Tom Riddle asks about Horcruxes to his potions teacher, [[Horace Slughorn]]|Harry Potter and the Half-Blood Prince}} |
||
| + | Obsessed with immortality from a young age, [[Tom Riddle|Lord Voldemort]] created a series of [[Horcrux]]es in an effort to prevent his death.<ref name="HBP23">{{HBP|B|23}}</ref> A Horcrux is a vessel into which one places a piece of one's soul to protect one from mortal death.<ref name="HBP23" /> Tom Riddle created his first Horcrux around the age of 16, and this became known as [[Tom Riddle's Diary]]. He used the death of a [[Muggle-born]] student named [[Myrtle Warren]] to create it, whom he had killed with [[Serpent of Slytherin|Slytherin's Basilisk]], while she was in the girls lavatory. |
||
| + | [[File:Slughorn and Riddle.jpeg|250px|thumb|left|Riddle discussing Horcruxes with Slughorn]] |
||
| − | ==Background information== |
||
| + | The following school year, Tom asked Horace Slughorn, his Potions professor, about Horcruxes and learned that it was indeed possible to create more than one. Over the ensuing years using the murders of Muggles and wizards alike, he created four more Horcruxes. These were [[Marvolo Gaunt's Ring]], [[Salazar Slytherin's Locket|Slytherin's Locket]], [[Helga Hufflepuff's Cup|Hufflepuff's Cup]], and [[Rowena Ravenclaw's Diadem|Ravenclaw's Diadem]]. He believed seven to be a magically powerful number and wished to create a seven part soul, but he seemed to save the creation of Horcruxes for murders he considered significant.<ref name="HBP23" /> |
||
| − | ===Creation of the Horcruxes=== |
||
| − | {{Quote|Sir, I wondered what you know about. . . about Horcruxes?|Tom Riddle asks about Horcruxes to his potions teacher, [[Horace Slughorn]]|Harry Potter and the Half-Blood Prince}} |
||
| − | [[File:RiddleandSlughorn.jpeg|thumb|Riddle discusses Horcruxes with Slughorn]] |
||
| − | Obsessed with immortality from a young age, [[Tom Riddle|Lord Voldemort]] created a series of [[Horcrux]]es in an effort to prevent his death.<ref name="HBP23">''[[Harry Potter and the Half-Blood Prince]]'' - Chapter 23 (''Horcruxes'')</ref> A Horcrux is a vessel into which one places a piece of one's soul to protect one from mortal death.<ref name="HBP23" /> Tom Riddle created his first Horcrux around the age of 16, and this became known as [[Tom Riddle's Diary]]. He used the death of a [[Muggle-born]] student named [[Myrtle]] to create it whom he had killed with [[Salazar Slytherin's basilisk]]. The following school year, Tom asked [[Horace Slughorn]], his Potions professor, about Horcruxes and learned that it was indeed possible to create more than one. Over the ensuing years using the murders of [[Muggle]]s and [[wizards]] alike, he created four more Horcruxes. These were [[Marvolo Gaunt's Ring]], [[Salazar Slytherin's Locket]], [[Helga Hufflepuff's Cup]], and [[Rowena Ravenclaw's Diadem]]. He believed seven to be a magically powerful number and wished to create a seven part soul, but he seemed to save the creation of Horcruxes for significant murders.<ref name="HBP23" /> |
||
| − | [[File: |
+ | [[File:Voldemort soul.jpg|250px|thumb|Voldemort's twisted and mangled soul]] |
| − | As of |
+ | As of [[Hallowe'en]] [[1981]], he had a six part soul with five finished Horcruxes, but the process had rendered his remaining soul very unstable. That evening, Lord Voldemort went to destroy [[Harry Potter]], whom he believed to be the subject of a [[Sybill Trelawney's first prophecy|prophecy]]. This prophecy predicted that Harry may be the one with the power to destroy him. When Voldemort's unstable soul was struck with his rebounding curse, a part of it shattered off, and attached itself to Harry.<ref name="DH35">{{DH|B|35}}</ref> Sometime after his resurrection, Voldemort created a sixth intentional Horcrux by turning his snake, [[Nagini]], into a Horcrux.<ref name="HBP23" /> As of this point, he had a seven part soul, due to the prior destruction of Tom Riddle's diary. |
| − | ===Quirrell as a temporary Horcrux=== |
+ | ====Quirrell as a temporary Horcrux==== |
| − | + | {{Main|Quirinus Quirrell}} |
|
| + | {{Quote|What is this magic?!|Quirrell reacting to Harry's hands in the Underground Chambers|Harry Potter and the Philosopher's Stone (film)}} |
||
| − | {{main|Quirinus Quirrell}} |
||
| + | Quirrell was able to penetrate the first six chambers that protected the [[Philosopher's Stone]] with mild difficulty, including the chamber in which he himself put a [[Troll]]. He reached the final chamber only to find the [[Mirror of Erised]], and was unable to figure out how to take the Stone from it, going so far as to consider smashing the mirror. |
||
| + | [[File:Quirrell and Harry by the Mirror of Erised.png|250px|thumb|left|Quirrell and Voldemort in confrontation, while in the Underground Chambers]] |
||
| − | {{Quote|What is this magic?!|Quirrell reacting to Harry's hands in the Underground Chambers.|Harry Potter and the Philosopher's Stone (film)}} |
||
| + | Eventually, Harry alone managed to reach the last chamber, and was surprised to meet Quirrell instead of Snape. Quirrell non-verbally bound Harry and summoned a wall of fire behind the door to prevent him from escaping, then, on Voldemort's command, forced Harry to look into the mirror. Harry saw his reflection with the Stone in his own trousers' pocket, and felt it indeed being transferred to his real pocket. When Harry lied about what he saw in the mirror, Quirrell unwrapped his turban to reveal Lord Voldemort's face, bound to the back of his head. Quirrell and Harry struggle for possession of the Stone. |
||
| + | [[File:Harry Potter touches Quirrel face.gif|250px|thumb|Harry's touch burning Quirrell, causing him to die]] |
||
| − | Quirrell was able to penetrate the first six chambers that protected the [[Philosopher's Stone]], including the chamber in which he himself put a [[Troll]]. He reached the final chamber only to find the [[Mirror of Erised]], and was unable to figure out how to take the Stone from it, going so far as to consider smashing the mirror. |
||
| + | Quirrel's life ended then, when Voldemort forced him to attempt the murder of Harry Potter (deducing that Harry had the Stone and being unable to persuade him to give it willingly). Unfortunately, the body Quirrell and Voldemort were both sharing manifested in burns and blisters during his fight with Harry due to the protective power Harry's mother left in his skin when she died for him. It was consequently burned so horribly that Quirrell collapsed and died (Voldemort, however, was merely dispossessed and fled). However, despite being effectively turned into a living Horcrux — like Nagini — for the last year of his life, Quirrell did not ultimately lose his soul, having even tried to put up feeble resistance on occasion (in spite of the fact that Voldemort was far too strong for him). |
||
| + | ===Albus Dumbledore discovering the secret=== |
||
| − | Eventually, Harry alone managed to reach the last chamber, and was surprised to meet Quirrell instead of Snape. Quirrell non-verbally bound Harry and summoned a wall of fire behind the door to prevent him from escaping, then, on Voldemort's command, forced Harry to look into the mirror. Harry saw his reflection with the Stone in his own trousers' pocket, and felt it indeed being transferred to his real pocket. When Harry lied about what he saw in the mirror, Quirrell unwrapped his turban to reveal Lord Voldemort's face, bound to the back of his head. |
||
| + | ====Harry destroying Tom Riddle's diary==== |
||
| − | Quirrell and Harry struggle for possession of the Stone. |
||
| − | |||
| − | Quirrel's life ended then, when Voldemort forced him to attempt the murder of Harry Potter (deducing that Harry had the Stone and being unable to persuade him to give it willingly). Unfortunately, the body Quirrell and Voldemort were both sharing manifested in burns and blisters during his fight with Harry due to the protective power Harry's mother left in his skin when she died for him. It was consequently burned so horribly that Quirrell collapsed and died (Voldemort, however, was merely dispossessed and fled). However, despite being effectively turned into a living Horcrux—like Nagini—for the last year of his life, Quirrell did not ultimately lose his soul, having even tried to put up feeble resistance on occasion (in spite of the fact that Voldemort was far too strong for him). |
||
| − | |||
| − | ==Albus Dumbledore discovers the secret== |
||
| − | |||
| − | ===Harry destroys Tom Riddle's diary=== |
||
{{Quote|Funny the damage a silly, little book can do. Especially in the hands of a [[Ginevra Weasley|silly, little girl]].|[[Tom Riddle|Lord Voldemort]]|Harry Potter and the Chamber of Secrets (film)}} |
{{Quote|Funny the damage a silly, little book can do. Especially in the hands of a [[Ginevra Weasley|silly, little girl]].|[[Tom Riddle|Lord Voldemort]]|Harry Potter and the Chamber of Secrets (film)}} |
||
| + | [[File:Harry-potter2-movie-trio.jpg|250px|thumb|left|The trio discussing the diary after finding it in a washroom]] |
||
| + | In [[1993]], [[Hogwarts School of Witchcraft and Wizardry]] was under siege from an unseen terror. The [[Chamber of Secrets]] had been opened once more and the terror within unleashed upon the school's population.<ref name="CS10">{{COS|B|10}}</ref> After several students had been petrified, [[Harry Potter]] and his best friends [[Ronald Weasley|Ron Weasley]] and [[Hermione Granger]] managed to solve the mystery. After discovering a few cryptic clues and a mysterious diary, they realised that the monster that had been petrifying the students was a [[Serpent of Slytherin|Basilisk]] and that the entrance to the Chamber was located in [[Myrtle Warren]]'s bathroom.<ref name="CS16">{{COS|B|16}}</ref> Unfortunately, Hermione also became a victim of the Basilisk before they could solve the mystery. |
||
| + | When [[Ginevra Weasley|Ginny Weasley]] was taken into the Chamber by the monster, Harry and Ron went to find her. They attempted to give their information to [[Gilderoy Lockhart]], who had been tasked with finding Ginny, only to find out that he was fraud and that he was about to flee the castle. At wand point, Harry and Ron took Lockhart to Myrtle's bathroom and discovered the entrance to the Chamber of Secrets.<ref name="CS16" /> After the three of them entered the Chamber, Lockhart attempted to erase the memories of Harry and Ron. The [[Ronald Weasley's first wand|wand]] backfired, causing Lockhart permanent mental damage and a cave in. While Ron created an exit through the rocks, Harry ventured deeper into the Chamber.<ref name="CS16" /> |
||
| − | [[File:Riddle Diary.jpg|thumb|left|Tom Riddle's Diary]] |
||
| − | In [[1993]], [[Hogwarts School of Witchcraft and Wizardry]] was under siege from an unseen terror. The [[Chamber of Secrets]] had been opened once more and the terror within unleashed upon the school's population.<ref name="CS10">''[[Harry Potter and the Chamber of Secrets]]'' - Chapter 10 (''The Rogue Bludger'')</ref> After several students had been Petrified, [[Harry Potter]] and his best friends [[Ronald Weasley|Ron Weasley]] and [[Hermione Granger]] managed to solve the mystery. After discovering a few cryptic clues and a mysterious [[Tom Riddle's Diary|diary]], they realised that the monster that had been Petrifying the students was a [[Salazar Slytherin's basilisk|basilisk]] and that the entrance to the Chamber was located in [[Myrtle|Moaning Myrtle]]'s bathroom.<ref name="CS16">''[[Harry Potter and the Chamber of Secrets]]'' - Chapter 16 (''The Chamber of Secrets'')</ref> Unfortunately, Hermione also became a victim of the basilisk before they could solve the mystery. |
||
| + | [[File:Harry Ginny Tom Chamber of Secrets.jpg|250px|thumb|Harry with an unconscious Ginny lying in the Chamber of Secrets]] |
||
| − | When [[Ginevra Weasley|Ginny Weasley]] was taken into the Chamber by the monster, Harry and Ron went to find her. They attempted to give their information to [[Gilderoy Lockhart]], who had been tasked with finding Ginny, only to find out that he was fraud and that he was about to flee the castle. At wand point, Harry and Ron took Lockhart to Myrtle's bathroom and discovered the entrance to the Chamber of Secrets.<ref name="CS16" /> After the three of them entered the Chamber, Lockhart attempted to [[Memory Charm|erase]] the memories of Harry and Ron. The [[Ronald Weasley's first wand|wand]] backfired, causing Lockhart permanent mental damage and a cave in. While Ron created an exit through the rocks, Harry ventured deeper into the Chamber.<ref name="CS16" /> |
||
| + | Harry discovered Ginny laying on the ground and was informed by Tom Riddle, the boy from the mysterious diary, that she was almost dead. When Harry tried to warn Tom of the great danger, Tom explained that he was the great danger, being the boy who would become Lord Voldemort. He then summoned the Basilisk from the depths of the Chamber.<ref name="CS17">{{COS|B|17}}</ref> Harry was able to kill the Basilisk with the aid of [[Fawkes]], [[Albus Dumbledore|Dumbledore]]'s pet [[phoenix]]. However, Harry was badly injured by a Basilisk fang. Fawkes healed Harry's wound, but Riddle was still about to kill Harry with his own wand. |
||
| + | [[File:Diary fang.jpg|250px|thumb|left|Harry stabbing the diary with a Basilisk fang]] |
||
| − | [[File:Chamber.png|thumb|262px|The Chamber of Secrets.]]Harry discovered Ginny laying on the ground and was informed by Tom Riddle, the boy from the mysterious diary, that she was almost dead. When Harry tried to warn Tom of the great danger, Tom explained that he was the great danger, being the boy who would become Lord Voldemort. He then summoned the basilisk from the depths of the Chamber.<ref name="CS17">''[[Harry Potter and the Chamber of Secrets]]'' - Chapter 17 (''The Heir of Slytherin'')</ref> Harry was able to kill the basilisk with the aid of [[Fawkes]], [[Albus Dumbledore|Dumbledore]]'s pet [[phoenix]]. However, Harry was badly injured by a basilisk fang. Fawkes healed Harry's wound, but Riddle was still about to kill Harry with his own wand. |
||
| + | At that moment Fawkes swept Riddle's diary into Harry's hands, and Harry stabbed the diary with a fang.<ref name="CS17" /> He did this instinctively, without any prior knowledge that it would destory the diary. Riddle disappeared, and Ginny's vitality was restored. She explained to Harry that she had been setting the Basilisk on the student population, because she had been possessed by Tom Riddle through the diary. When Harry, Ron, Ginny, Lockhart, and Fawkes triumphantly returned to [[Minerva McGonagall]]'s office, Harry explained everything that had happened including the diary's possession of Ginny to Dumbledore.<ref name="CS18">{{COS|B|18}}</ref> |
||
| + | [[File:B2C18M1 Sword of Gryffindor engraving.png|250px|thumb|Harry Potter and Dumbledore discussing the events]] |
||
| − | [[File:Basilisk.jpg|thumb|left|Salazar Slytherin's basilisk.]] |
||
| + | Harry's description of the events and the diary's part in said events piqued Dumbledore's interest. He had been suspicious of Voldemort's experiments with dark magic for years. After years of careful consideration, Dumbledore had come to the conclusion that Voldemort had created Horcruxes to ensure his immortality, but he had no proof. When Harry brought the diary to Dumbledore, he thought he finally had the evidence to confirm his theory. What troubled Dumbledore most of all was the lax nature of the diary's security. As it contained a part of Voldemort's soul, Dumbledore thought that it should have been hidden and not recklessly thrown into danger, risking its destruction. He came to the conclusion that Voldemort must have created more than one Horcrux, but once again he had no proof.<ref name="HBP23" /> |
||
| + | ====Destruction of Marvolo Gaunt's Ring==== |
||
| − | At that moment Fawkes swept Riddle's diary into Harry's hands, and Harry stabbed the diary with a fang.<ref name="CS17" /> Riddle disappeared, and Ginny's vitality was restored. She explained to Harry that she had been setting the basilisk on the student population, because she had been possessed by Tom Riddle through the diary. When Harry, Ron, Ginny, Lockhart, and Fawkes triumphantly returned to [[Minerva McGonagall]]'s office, Harry explained everything that had happened including the diary's possession of Ginny to Dumbledore.<ref name="CS18">''[[Harry Potter and the Chamber of Secrets]]'' - Chapter 18 (''Dobby's Reward'')</ref> |
||
| + | {{Main|Marvolo Gaunt's Ring}} |
||
| + | {{Quote|I was tempted.|Albus Dumbledore on why he put on Gaunt's ring|Harry Potter and the Deathly Hallows}} |
||
| + | [[File:Tom with ring.jpg|250px|thumb|left|Teenage Tom Riddle (Lord Voldemort) with the ring]] |
||
| + | Having researched [[Tom Riddle|Lord Voldemort]]'s life and heritage, Albus Dumbledore noted a ring worn by Lord Voldemort's maternal grandfather, [[Marvolo Gaunt]].<ref name="HBP10">{{HBP|B|10}}</ref> Through the many memories he had collected concerning Voldemort, he discovered that the ring passed to [[Morfin Gaunt]]. When he sought out Morfin, he retrieved a memory showing Tom Riddle's discovery of his Gaunt and Muggle heritage. Dumbledore noted that the ring was missing after Morfin's encounter with his nephew.<ref name="HBP17">{{HBP|B|17}}</ref> From further research of Tom Riddle's childhood, Dumbledore knew that Riddle liked to collect trophies and surmised that he had likely stolen the ring. As an object of particular meaning to Riddle, Dumbledore thought that Voldemort had likely turned it into one of his very first Horcruxes. |
||
| + | [[File:Albus Dumbledore wearing Marvolo Gaunt's Ring.jpg|250px|thumb|[[Albus Dumbledore]] with Marvolo Gaunt's Ring]] |
||
| − | Harry's description of the events and the diary's part in said events piqued Dumbledore's interest.<ref name="HBP23" /> He had been suspicious of Voldemort's experiments with dark magic for years. After years of careful consideration, Dumbledore had come to the conclusion that Voldemort had created Horcruxes to ensure his immortality, but he had no proof. When Harry brought the diary to Dumbledore, he thought he finally had the evidence to confirm his theory. What troubled Dumbledore most of all was the lax nature of the diary's security.<ref name="HBP23" /> As it contained a part of Voldemort's soul, Dumbledore thought that it should have been hidden and not recklessly thrown into danger, risking its destruction. He came to the conclusion that Voldemort must have created more than one Horcrux, but once again he had no proof.<ref name="HBP23" /> |
||
| + | In the summer of 1996, Albus Dumbledore searched for the ring. He discovered it concealed in the Gaunt shack.<ref name="HBP23" /> In the ring was set a stone that Marvolo Gaunt stated bore the "Peverell coat of arms".<ref name="HBP10" /> The stone set in the ring was, in fact, the [[Resurrection Stone]] of [[Deathly Hallows]] fame. Upon seeing the stone, Dumbledore put on the ring in hopes of once again seeing his dead family, forgetting that it was a [[Horcrux]].<ref name="DH35" /> The ring contained a deadly curse, which Dumbledore only managed to keep at bay due to his extreme skill. |
||
| + | Dumbledore destroyed the horcrux with [[Godric Gryffindor's Sword]] as it was able to destroy horcruxes as it contained Basilisk venom that had become attached when Harry killed the [[Salazar Slytherin's Basilisk|Basilisk]], but to his surprise the curse was not eliminated. Dumbledore contacted Severus Snape who was able to trap the curse in Dumbledore's hand using a number of spells and potions. However, Severus Snape and Dumbledore found out that the curse would spread throughout his body and kill him in a year's time. Because of this, he told Severus Snape to mercifully end his life before he was in pain. |
||
| − | ===Destruction of Marvolo Gaunt's Ring=== |
||
| − | {{main|Marvolo Gaunt's Ring}} |
||
| − | |||
| − | {{Quote|I was tempted.|[[Albus Dumbledore]] on why he put on Gaunt's ring|Harry Potter and the Deathly Hallows}} |
||
| − | |||
| − | [[File:Dumbledore-ring.JPG|thumb|Marvolo Gaunt's ring.]] |
||
| − | Having researched [[Tom Riddle|Lord Voldemort]]'s life and heritage, [[Albus Dumbledore]] noted a ring worn by Lord Voldemort's maternal grandfather, [[Marvolo Gaunt]].<ref name="HBP10">''[[Harry Potter and the Half-Blood Prince]]'' - Chapter 10 (''The House of Gaunt'')</ref> Through the many memories he had collected concerning Voldemort, he discovered that the ring passed to [[Morfin Gaunt]]. When he sought out Morfin, he retrieved a memory showing Tom Riddle's discovery of his Gaunt and Muggle heritage. Dumbledore noted that the ring was missing after Morfin's encounter with his nephew.<ref name="HBP17">''[[Harry Potter and the Half-Blood Prince]]'' - Chapter 17 (''A Sluggish Memory'')</ref> From further research of Tom Riddle's childhood, Dumbledore knew that Riddle liked to collect trophies and surmised that he had likely stolen the ring. As an object of particular meaning to Riddle, Dumbledore thought that Voldemort had likely turned it into a Horcrux. |
||
| − | |||
| − | In the summer of [[1996]], Albus Dumbledore searched for the ring. He discovered it concealed in the Gaunt shack.<ref name="HBP23" /> In the ring was set a stone that [[Marvolo Gaunt]] stated bore the "Peverell coat of arms."<ref name="HBP10" /> The stone set in the ring was, in fact, the [[Resurrection Stone]] of [[Deathly Hallows]] fame. Upon seeing the stone, Dumbledore put on the ring in hopes of once again seeing his dead family, forgetting that it was a [[Horcrux]].<ref name="DH35" /> The ring contained a deadly curse which Dumbledore only managed to keep at bay due to his extreme skill. Dumbledore destroyed the horcrux with [[Godric Gryffindor's Sword]] as it was albe to destroy horcruxes as it contained basilisk venom that had become attached when Harry killed the [[Salazar Slytherin's Basilisk|Basilisk]], but to his surprise the curse was not eliminated. Dumbledore contacted Severus Snape who was able to trap the curse in Dumbledore's hand using a number of spells and potions. However Severus Snape and Dumbledore found out that the curse would spread throughout his body and kill him in a years time. Because of this, he told Severus Snape to mercifully end his life before he was in pain. |
||
| − | |||
| − | ==Harry's search for the Horcruxes== |
||
| − | ===Background Information=== |
||
| − | [[File:Harrypotteranddumbeldorelesson.jpg|thumb|260px|left|Dumbledore showing Harry a memory.]] |
||
| + | ===Harry's search for the Horcruxes=== |
||
| + | ====Background information==== |
||
{{Main|Harry Potter and Albus Dumbledore's private lessons}} |
{{Main|Harry Potter and Albus Dumbledore's private lessons}} |
||
| + | {{Quote|I spend time with Harry because I have things to discuss with him, information I must give him before it is too late.|Dumbledore explains his private lessons with Harry to [[Severus Snape]]|Harry Potter and the Deathly Hallows}} |
||
| + | [[File:Half-blood_lessons.jpg|250px|thumb|left|Dumbledore showing Harry a memory of Tom Riddle's past]] |
||
| + | During the 1996–1997 school year, Dumbledore began to share his findings regarding Voldemort's Horcruxes with Harry Potter.<ref name="HBP10" /> Using the [[Albus Dumbledore's Pensieve|Pensieve]], he showed Harry a series of memories about the boy who was Tom Riddle and the man who was Voldemort. During these [[Harry Potter and Albus Dumbledore's private lessons|lessons]], Dumbledore taught Harry about the behaviours and psychology of Voldemort hoping to impart a thorough understanding of the man upon Harry. In January 1997, Dumbledore showed Harry a memory of Tom Riddle meeting with the his [[Potions Master]], [[Horace Slughorn]] who had recently returned to Hogwarts from retirement. The memory became cloudy, and Slughorn's voice boomed out of nowhere.<ref name="HBP17" /> |
||
| + | [[File:Slughorns Memory HBP.png|250px|thumb|Harry retrieving the ''real'' memory from Slughorn]] |
||
| − | During the [[1996–1997 school year]], Dumbledore began to share his findings regarding Voldemort's Horcruxes with Harry Potter.<ref name="HBP10" /> Using the [[Albus Dumbledore's Pensieve|Pensieve]], he showed Harry a series of memories about the boy who was Tom Riddle and the man who was Voldemort. During these [[Harry Potter and Albus Dumbledore's private lessons|lessons]], Dumbledore taught Harry about the behaviours and psychology of Voldemort hoping to impart a thorough understanding of the man upon Harry. In January of 1997, Dumbledore showed Harry a memory of Tom Riddle meeting with the his [[Potions master]], [[Horace Slughorn]] who had recently returned to Hogwarts from retirement. The memory became cloudy, and Slughorn's voice boomed out of nowhere.<ref name="HBP17" /> |
||
| + | When they returned from the Pensieve, Dumbledore told Harry that the memory had been falsified and gave Harry the mission of obtaining the true memory. Months later when Harry did obtain the real memory, he and Dumbledore had an impromptu lesson well after midnight.<ref name="HBP23" /> They discovered that Riddle asked Slughorn if it were possible to split one's soul into seven pieces. Following this shocking revelation, Harry and Dumbledore discussed some of the objects that may be Horcruxes. From the memories they had watched, they deduced that in addition to the two Horcruxes already destroyed there were four more. They also thought that they possibly were Salazar Slytherin's Locket, Helga Hufflepuff's Cup, an object that belonged to either Ravenclaw or Gryffindor, and Nagini.<ref name="HBP23" /> |
||
| + | ====Slytherin's Locket==== |
||
| − | {{Quote|You'll go wrong, boy, mark my words.|[[Horace Slughorn]] to [[Tom Riddle]] in his falsified memory|Harry Potter and the Half-Blood Prince}}When they returned from the Pensieve, Dumbledore told Harry that the memory had been falsified and gave Harry the mission of obtaining the true memory. Months later when Harry did obtain the real memory, he and Dumbledore had an impromptu lesson well after midnight.<ref name="HBP23" /> They discovered that Riddle asked Slughorn if it were possible to split one's soul into seven pieces. Following this shocking revelation, Harry and Dumbledore discussed some of the objects that may be Horcruxes. From the memories they had watched, they deduced that in addition to the two Horcruxes already destroyed there were four more. They also thought that they possibly were Salazar Slytherin's Locket, Helga Hufflepuff's Cup, an object that belonged to either Ravenclaw or Gryffindor, and Nagini.<ref name="HBP23" /> |
||
| − | ===Attempt to get the locket |
+ | =====Attempt to get the locket===== |
| + | {{Main|Skirmish at the Cave (1997)}} |
||
| − | [[File:Horcruxcave.png|thumb|262px|The cave in which the locket was hidden.]] |
||
| + | {{Dialogue a-b-a-b|Albus Dumbledore|If I tell to to leave me and save yourself, you will do as I tell you?|Harry Potter|I —|Harry?|Yes, Sir.|Albus Dumbledore to Harry Potter, before leaving Hogwarts|Harry Potter and the Half-Blood Prince}} |
||
| + | In June, Dumbledore and Harry ventured to a [[The Cave|cave]] by the sea searching for a Horcrux.<ref name="HBP26">{{HBP|B|26}}</ref> Dumbledore thought that this cave was a likely place to hide a Horcrux, since it was remote, hard to reach, and a scene where Tom Riddle had harmed two of his fellow orphans at the orphanage. Once inside, the defences set by Voldemort began to act against them. First, a payment of blood was expected to gain entrance to the cave.<ref name="HBP26" /> Upon entering, they were confronted with a vast black lake but saw a green misty light shining from what appeared to be an island in the middle. |
||
| + | [[File:Locket in cave.jpg|250px|thumb|left|R.A.B.'s fake locket]] |
||
| − | {{Main|Second skirmish at the Horcrux cave}} |
||
| + | After a failed attempt at summoning the Horcrux by Harry, Dumbledore detected an invisible boat in the [[water]] and raised it. Dumbledore and Harry discussed the defences while on the boat and saw that the lake was full of [[Inferius|Inferi]] that were lying peacefully in the water. Dumbledore told Harry that the best weapon against inferi was fire, as they can't stand light and warmth. When they reached the island in the centre, they saw that the green glow was emanating from [[Emerald Potion|a potion]] in a basin. |
||
| + | [[File:B6C26M1 Dumbledore fire spell.jpg|250px|thumb|right|Dumbledore holding back Inferi with a ring of fire]] |
||
| − | In June, Dumbledore and Harry ventured to a [[Horcrux cave|cave]] by the sea searching for a Horcrux.<ref name="HBP26">''[[Harry Potter and the Half-Blood Prince]]'' - Chapter 26 (''The Cave'')</ref> Dumbledore thought that this cave was a likely place to hide a Horcrux, since it was remote, hard to reach, and a scene where Tom Riddle had harmed to of his fellow orphans at the orphanage. Once inside, the defences set by Voldemort began to act against them. First, a payment of blood was expected to gain entrance to the cave.<ref name="HBP26" /> Upon entering, they were confronted with a vast black lake but saw a green misty light shining from what appeared to be an island in the middle. After a failed attempt at summoning the Horcux by Harry, Dumbledore detected an invisible boat in the water and raised it. Dumbledore and Harry discussed the defences while on the boat and saw that the lake was full of [[Inferi]] that were lying peacefully in the water, Dumbledore told Harry that the best weapon against inferi was fire. When they reached the island in the center, they saw that the green glow was emanating from [[Drink of Despair|a potion]] in a basin. |
||
| + | After trying countless magical methods of removing the potion, Dumbledore decided that the only way to get rid of the potion was to drink it.<ref name="HBP26" /> He began drinking, but he could not finish it as the potion was causing him great pain. As agreed, Harry forced the rest of the potion down his Headmaster's throat. Once the basin was empty, Dumbledore asked for water, and Harry attempted to conjure some, but he was unable to give it to Dumbledore as it kept disappearing.<ref name="HBP26" /> Realising that the only way to get water would be from the lake, Harry ran down to the edge and filled the goblet with water. |
||
| − | + | He returned to Dumbledore and splashed it all over his face and mouth, but noted that he felt a cold grip on his arm that was an inferius. Disturbing the water woke the masses of [[Inferius|Inferi]]. Harry attempted to fight them off but forgot about Dumbledore's earlier command to use fire. Just as he was being dragged towards the water to drown, he was saved by an incredibly weakened Dumbledore. They took the locket from the basin and proceeded out of the cave managing to keep the ring of fire around the boat to ward off the corpses.<ref name="HBP26" /> |
|
| + | [[File:RAB note cropped.jpg|250px|thumb|left|Hermione and Harry reading RAB's note]] |
||
| − | ====Discovery of Regulus Black==== |
||
| + | After the [[Battle of the Astronomy Tower]] and Dumbledore's death, Harry discovered the [[Regulus Black's locket|locket]] was a fake. The real Horcrux had been taken by a mysterious person who called himself [[Regulus Black|"R.A.B."]] He was distraught at this news, believing that Dumbledore had weakened himself for nothing and that he had died in vain.<ref name="HBP28">{{HBP|B|28}}</ref> Harry decided that he had been taught about the Horcruxes for a reason and resolved to continue Dumbledore's work. |
||
| − | [[File:Fake_Horcrux_Locket.jpg|thumb|244px|R.A.B.'s locket.]] |
||
| − | {{main|Regulus Black}} |
||
| + | When he told Ron and Hermione, with whom he had shared everything Dumbledore had taught him, that he was going to drop out of [[Hogwarts School of Witchcraft and Wizardry|Hogwarts]], Ron and Hermione volunteered to join him on his mission.<ref name="HBP30">{{HBP|B|30}}</ref> They spent time during the summer of 1997 researching R.A.B., but they could find no leads.<ref name="DH6">{{DH|B|6}}</ref> After the [[Fall of the British Ministry of Magic|Ministry had fallen]], Harry, Ron, and Hermione escaped to [[12 Grimmauld Place]]. On their first morning there, Harry discovered the identity of R.A.B.<ref name="DH10">{{DH|B|10}}</ref> |
||
| − | {{Quote|It was I that discovered your secret.|[[Regulus Black]] on Voldemort's Horcruxes|Harry Potter and the Half-Blood Prince}} |
||
| − | |||
| − | After the [[Battle of the Astronomy Tower]] and Dumbledore's death, Harry discovered the [[Regulus Black's locket|locket]] was a fake. The real Horcrux had been taken by a mysterious person who called himself [[Regulus Black|"R.A.B."]] He was distraught at this news, believing that Dumbledore had weakened himself for nothing and that he had died in vain.<ref name="HBP28">''[[Harry Potter and the Half-Blood Prince]]'' - Chapter 28 (''Flight of the Prince'')</ref> Harry decided that he had been taught about the Horcruxes for a reason and resolved to continue Dumbledore's work. |
||
| − | |||
| − | [[File:R.A.B._letter_to_the_Dark_Lord_pertaining_to_the_Horcrux_Locket.jpg|thumb|left|208px|Regulus's note left in the locket]] |
||
| − | |||
| − | When he told Ron and Hermione, with whom he had shared everything Dumbledore had taught him, that he was going to drop out of [[Hogwarts School of Witchcraft and Wizardry|Hogwarts]], Ron and Hermione volunteered to join him on his mission.<ref name="HBP30">''[[Harry Potter and the Half-Blood Prince]]'' - Chapter 30 (''The White Tomb'')</ref> They spent time during the summer of [[1997]] researching R.A.B., but they could find no leads.<ref name="DH6">''[[Harry Potter and the Deathly Hallows]]'' - Chapter 6 (''The Ghoul in Pyjamas'')</ref> After the [[Fall of the Ministry of Magic|Ministry had fallen]], Harry, Ron, and Hermione escaped to [[12 Grimmauld Place]]. On their first morning there, Harry discovered the identity of R.A.B.<ref name="DH10">''[[Harry Potter and the Deathly Hallows]]'' - Chapter 10 (''Kreacher's Tale'')</ref> |
||
| + | =====Reclaiming of the locket===== |
||
| + | {{Quote|And she pulled the locket out of the pocket of her robes and handed it to Ron. It was as large as a chicken's egg. An ornate letter S, inlaid with many small green stones, glinted dully in the diffused light shining through the tent's canvas roof.|The trio reclaim the locket after breaking into the Ministry|Harry Potter and the Deathly Hallows}} |
||
| + | [[File:Harry-potter-deathly-hallows1 kreacher.jpg|250px|thumb|Harry interrogating [[Kreacher]] in regards to the real locket]] |
||
He had been Regulus Black, [[Sirius Black]]'s younger brother. He had joined the [[Death Eaters]], but backed out and was killed.<ref name="DH10" /> After searching the house, Hermione realised that the locket had been amongst the items they trashed two summers previous. Harry remembered that [[Kreacher]] had throughout that summer been stealing family heirlooms to protect them. He summoned Kreacher and asked about the locket. |
He had been Regulus Black, [[Sirius Black]]'s younger brother. He had joined the [[Death Eaters]], but backed out and was killed.<ref name="DH10" /> After searching the house, Hermione realised that the locket had been amongst the items they trashed two summers previous. Harry remembered that [[Kreacher]] had throughout that summer been stealing family heirlooms to protect them. He summoned Kreacher and asked about the locket. |
||
| + | Kreacher told them the tale of Regulus's break from the Death Eaters.<ref name="DH10" /> He told them that he had tried to destroy the locket, but could not and that it had been stolen from the house by [[Mundungus Fletcher]]. Harry dispatched Kreacher to find Mundungus. Three days later, Kreacher returned with Fletcher in tow. Fletcher told them that the locket had been taken from him by "''some Ministry hag''", who resembled a toad.<ref name="DH11">{{DH|B|11}}</ref> After hearing Mundungus's description, Harry, Ron, and Hermione knew that [[Dolores Umbridge]] was in possession of the locket. |
||
| − | [[File:Kreacherlocket.jpg|thumb|[[Harry Potter|Harry]] asking [[Kreacher]] who took the real locket.]] |
||
| + | {{Main|Infiltration of the British Ministry of Magic (1997)}} |
||
| − | Kreacher told them the tale of Regulus's break from the Death Eaters.<ref name="DH10" /> He told them that he had tried to destroy the locket, but could not and that it had been stolen from the house by [[Mundungus Fletcher]]. Harry dispatched Kreacher to find Mundungus. Three days later, Kreacher returned with Fletcher in tow. Fletcher told them that the locket had been taken from him by "some Ministry hag", who resembled a toad.<ref name="DH11">''[[Harry Potter and the Deathly Hallows]]'' - Chapter 11 (''The Bribe'')</ref> After hearing Mundungus's description, Harry, Ron, and Hermione knew that [[Dolores Umbridge]] was in possession of the locket. |
||
| + | [[File:HPDH1-1766.jpg|250px|thumb|left|The trio grabbed Reg Cattermole, Albert Runcorn, and Mafalda Hopkirk and plucked out a strand of their hair]] |
||
| + | After coming to this chilling realisation, Harry, Ron, and Hermione set to planning.<ref name="DH12">{{DH|B|12}}</ref> They decided to break into the [[British Ministry of Magic|Ministry of Magic]] and retrieve the locket from Umbridge in person. After a month of planning and careful observation underneath the [[Invisibility Cloak]], they decided the time was right.<ref name="DH12" /> On 2 September, Harry (disguised as [[Albert Runcorn]]), Ron (disguised as [[Reginald Cattermole]]), and Hermione (disguised as [[Mafalda Hopkirk]]) infiltrated the Ministry of Magic. |
||
| + | The trio soon became separated as Cattermole was needed to stop the rain in Yaxley's office, and Mafalda was dispatched to the [[Muggle-Born Registration Commission]] as the stenographer.<ref name="DH12" /> Harry, now on his own, came to the realisation that their plan had been quite ill conceived, because they had made no contingency for being separated or in fact planned anything once they were inside. Under the [[Cloak of Invisibility]], he ventured to Umbridge's office to search it. He did not find the Horcrux, but he did find Alastor Moody's magical eye on her door. He stole the eye and set off to find Umbridge and Hermione.<ref name="DH13">{{DH|B|13}}</ref> |
||
| − | ====Infiltration of the Ministry of Magic==== |
||
| − | [[File:Locketonumbridge.jpg|thumb|260px|[[Dolores Umbridge]] with the locket.]] |
||
| − | {{main|Infiltration of the Ministry of Magic}} |
||
| − | After coming to this chilling realisation, Harry, Ron, and Hermione set to planning.<ref name="DH12">''[[Harry Potter and the Deathly Hallows]]'' - Chapter 12 (''Magic is Might'')</ref> They decided to break into the [[British Ministry of Magic|Ministry of Magic]] and retrieve the locket from Umbridge in person. After a month of planning and careful observation underneath the [[Invisibility cloak]], they decided the time was right.<ref name="DH12" /> On [[2 September]], Harry (disguised as [[Albert Runcorn]]), Ron (disguised as [[Reginald Cattermole]]), and Hermione (disguised as [[Mafalda Hopkirk]]) infiltrated the Ministry of Magic. They soon became separated as Cattermole was needed to stop the rain in [[Yaxley]]'s office, and Mafalda was dispatched to the [[Muggle-Born Registration Commission]] as the stenographer.<ref name="DH12" /> Harry, now on his own, came to the realisation that their plan had been quite ill conceived, because they had made no contingency for being separated or in fact planned anything once they were inside. Under the [[Cloak of Invisibility]], he ventured to Umbridge's office to search it. He did not find the Horcrux, but he did find [[Alastor Moody's magical eye]] on her door. He stole the eye and set off to find Umbridge and Hermione.<ref name="DH13">''[[Harry Potter and the Deathly Hallows]]'' - Chapter 13 (''The Muggle-Born Registration Commission'')</ref> |
||
| + | [[File:Umbridge_locket.jpg|250px|thumb|Umbridge wearing the locket while interrogating Muggle-borns]] |
||
| − | [[File:Ministrybreakin.png|thumb|left|The trio escaping the Ministry atrium.]]In the courtrooms downstairs, Hermione was witnessing, in fact participating in, the oppression of [[Muggle-born]] wizards and witches, who were being stripped of their wands and rights. Once she had been joined by Harry, who remained underneath the Invisibility cloak, she convinced Umbridge to reveal the locket. When Harry was enraged by Umbridge's comments about her "pure-blood" heritage, he attacked her and Yaxley.<ref name="DH13" /> In the fracas, Hermione pocketed the Horcrux and replaced it with a [[Geminio|copy]]. He and Hermione used [[Patronus]]es to drive the [[Dementor]]s back and ushered the Muggle-borns awaiting trial out to the Atrium, where they were instructed to flee with their families. Out in the Atrium, Harry and Hermione met up with Ron and made their escape, but only after revealing the location of [[12 Grimmauld Place]] to Yaxley.<ref name="DH13" /> |
||
| + | In the courtrooms downstairs, Hermione was witnessing, in fact participating in, the oppression of [[Muggle-born]] wizards and witches, who were being stripped of their wands and rights. Once she had been joined by Harry, who remained underneath the Invisibility Cloak, she convinced Umbridge to reveal the locket. When Harry was enraged by Umbridge's comments about her "pure-blood" heritage, he attacked her and Yaxley.<ref name="DH13" /> In the fracas, Hermione pocketed the Horcrux and [[Doubling Charm|replaced it]] with [[Replica of Slytherin's Locket|a copy]]. |
||
| + | He and Hermione used [[Patronus Charm|Patronuses]] to drive the [[Dementor]]s back and ushered the Muggle-borns awaiting trial out to the Atrium, where they were instructed to flee with their families. Out in the Atrium, Harry and Hermione met up with Ron and made their escape, but only after revealing the location of [[12 Grimmauld Place]] to Yaxley.<ref name="DH13" /> |
||
| − | ====Destruction of the locket==== |
||
| + | =====Destruction of the locket===== |
||
| − | {{Quote|Ron, kill it!|[[Harry Potter|Harry]] yells at [[Ronald Weasley|Ron]] to destroy the Locket|Harry Potter and the Deathly Hallows: Part 1}} |
||
| + | {{Quote|Ron, kill it!|[[Harry Potter|Harry]] yelling at Ron to destroy the Locket|Harry Potter and the Deathly Hallows: Part 1}} |
||
| + | After escaping the Ministry of Magic, Harry, Ron, and Hermione had the Horcrux, but no means with which to destroy it. They spent months on the run and passed the locket between them in order to keep it safe. As they were good people, the locket had a visibly bad effect on the trio.<ref name="DH15">{{DH|B|15}}</ref> This was the opposite of what Harry witnessed with Umbridge. |
||
| + | [[File:NaginiCombat.gif|250px|thumb|left|Harry being attacked by Nagini while in Bathilda Bagshot's cottage]] |
||
| − | After escaping the Ministry of Magic, Harry, Ron, and Hermione had the Horcrux, but no means with which to destroy it. They spent months on the run and passed the locket between them in order to keep it safe. As they were good people, the locket had a visibly bad effect on the trio.<ref name="DH15">''[[Harry Potter and the Deathly Hallows]]'' - Chapter 15 (''Goblin's Revenge'')</ref> This was the opposite of what Harry witnessed with Umbridge. |
||
| + | The locket caused them to become moody and bicker over petty things like cooking. Some time in the fall, the trio overheard another group of fugitives talking. It was revealed by the goblins [[Griphook]] and [[Gornuk]] that the sword in the [[Lestrange Vault]] was in fact a fake. At this, Harry and Hermione surmised that Gryffindor's sword was impregnated with Basilisk venom and that it could destroy Horcruxes.<ref name="DH15" /> Hearing their excitement drove Ron, who was wearing the locket, over the edge. Ron exclaimed that they had discovered yet another object that they would have to search for and he abandoned his friends in a rage of fury and jealousy after having an intense row with Harry.<ref name="DH15" /> |
||
| + | [[File:Locket_destruction.gif|250px|thumb|[[Ronald Weasley|Ron Weasley]] destroying a Horcrux with the Sword of Gryffindor]] |
||
| − | [[File:Ron_destroying_the_Horcrux.jpg|thumb|Ron destroys the locket.]] |
||
| + | After Harry and Hermione's disastrous journey to [[Godric's Hollow]], they camped in the [[Forest of Dean]].<ref name="DH19">{{DH|B|19}}</ref> They discussed Harry's broken wand, and Ron heard his name through the [[Deluminator]] bequeathed to him by Dumbledore. Using the Deluminator, he returned in time to save Harry from drowning in a frozen pond. Harry had followed a mysterious Patronus into the night and found the Sword of Gryffindor.<ref name="DH19" /> When he tried to retrieve the sword, the locket which he was still wearing attempted to kill him. Ron pulled him and the sword out of the pond. Harry understood that Ron must destroy the locket since he had retrieved the sword. After a battle with the locket's energy in which Ron's greatest fears were played upon by the locket, Ron destroyed the locket with the sword and returned to his friends.<ref name="DH19" /> |
||
| − | The locket caused them to become moody and bicker over petty things like cooking. Some time in the fall, the trio overheard another group of fugitives talking. It was revealed by the [[goblin]]s [[Griphook]] and [[Gornuk]] that the sword in the [[Lestrange Vault]] was in fact a fake. At this, Harry and Hermione surmised that Gryffindor's sword was impregnated with [[Basilisk venom]] and that it could destroy Horcruxes.<ref name="DH15" /> Hearing their excitement drove Ron, who was wearing the locket, over the edge. Ron exclaimed that they had discovered yet another object that they would have to search for and he abandoned his friends in a rage of fury and jealousy.<ref name="DH15" /> |
||
| − | |||
| − | After Harry and Hermione's disastrous [[Attack at Godric's Hollow (1997)|journey]] to [[Godric's Hollow]], they camped in the [[Forest of Dean]].<ref name="DH19">''[[Harry Potter and the Deathly Hallows]]'' - Chapter 19 (''The Silver Doe'')</ref> They discussed Harry's broken wand, and Ron heard his named through the [[Deluminator]] bequeathed to him by Dumbledore. Using the Deluminator, he returned in time to save Harry from drowning in a frozen pond. Harry had followed a mysterious Patronus into the night and found the Sword of Gryffindor.<ref name="DH19" /> When he tried to retrieve the sword, the locket which he was still wearing attempted to kill him. Ron pulled him and the sword out of the pond. Harry understood that Ron must destroy the locket since he had retrieved the sword. After a battle with the locket's energy in which Ron's greatest fears were played upon by the locket, Ron destroyed the locket with the sword and returned to his friends.<ref name="DH19" /> |
||
| − | |||
| − | ===Capture by Snatchers and Skirmish at Malfoy Manor=== |
||
| − | [[File:Hermione_skimirish_at_malfoy_manor.JPG|thumb|314px|Bellatrix with a knife to Hermione's throat.]] |
||
| + | ====Skirmish at Malfoy Manor==== |
||
{{Main|Skirmish at Malfoy Manor}} |
{{Main|Skirmish at Malfoy Manor}} |
||
| + | {{Dialogue|Hermione Granger|Are you saying there's a Horcrux in the [[Lestrange Vault|Lestranges' vault]]?|Harry Potter|Yes, Bellatrix was terrified when she thought we'd been in there, she was beside herself. Why? What did she think we'd seen, what else did she think we might have taken? Something she was petrified You-Know-Who would find out about.|Harry explains how he deduced the location of the Horcrux|Harry Potter and the Deathly Hallows}} |
||
| + | [[File:Harry-potter-deathly-hallows1 harry bellatrix.jpg|250px|thumb|left|Bellatrix at [[Malfoy Manor]] after the trio was caught by Snatchers]] |
||
| + | When the locket had been destroyed Harry, Ron, and Hermione were once again lost for new leads. They spent the next few months listlessly journeying through the countryside in a vain search for more clues.<ref name="DH22">{{DH|B|22}}</ref> It was not until around Easter that they found anything substantive. After listening to a pirate radio broadcast, ''[[Potterwatch]]'', Harry broke the [[Taboo]] on Voldemort's name.<ref name="DH22" /> The trio were captured by [[Snatchers]] and brought to Malfoy Manor. Their identities were confirmed, and [[Lucius Malfoy]] was about to summon the Dark Lord to the residence, but he was stopped by Bellatrix Lestrange. She saw Gryffindor's sword and assumed that the trio had broken into her Gringotts [[Lestrange Vault|vault]] and became almost hysterical.<ref name="DH23">{{DH|B|23}}</ref> |
||
| + | [[File:Bellatrix-x-Hermione-bellatrix-and-hermione-27355000-1280-528.jpg|250px|thumb|[[Bellatrix Lestrange|Bellatrix]] threatening to kill Hermione after torturing her]] |
||
| − | When the locket had been destroyed Harry, Ron, and Hermione were once again lost for new leads. They spent the next few months listlessly journeying through the countryside in a vain search for more clues.<ref name="DH22">''[[Harry Potter and the Deathly Hallows]]'' - Chapter 22 (''The Deathly Hallows'')</ref> It was not until around Easter that they found anything substantive. After listening to a pirate radio broadcast, [[Potterwatch]], Harry broke the [[Taboo]] on Voldemort's name.<ref name="DH22" /> The trio were captured by [[Snatchers]] and brought to [[Malfoy Manor]]. Their identities were confirmed, and [[Lucius Malfoy]] was about to summon the Dark Lord to the residence, but he was stopped by [[Bellatrix Lestrange]]. She saw Gryffindor's sword and assumed that the trio had broken into her Gringotts [[Lestrange Vault|vault]].<ref name="DH23">''[[Harry Potter and the Deathly Hallows]]'' - Chapter 23 (''Malfoy Manor'')</ref> |
||
| + | Bellatrix then separated Hermione for interrogation while the others were locked in the cellar with the other prisoners. In a blind panic, Harry scrambled in his bag for the shard of mirror and called out for help, and [[Dobby]] soon appeared in the cellar.<ref name="DH23" /> With Dobby's help, Harry managed to orchestrate their escape. In the ensuing skirmish, Ron saved Hermione while Harry defeated [[Draco Malfoy]] and took many wands from him.<ref name="DH23" /> Unfortunately, Dobby was killed in the escape. While overcome with grief for Dobby, Harry dug his grave and thought about the events of the day. He came to the conclusion that Voldemort had asked Bellatrix to store one of his Horcruxes at [[Gringotts Wizarding Bank]].<ref name="DH24">{{DH|B|24}}</ref> |
||
| + | ====Break-into Gringotts Wizarding Bank==== |
||
| − | [[File:Dobby223.jpg|thumb|left|270px|The group escape with the help of [[Dobby]].]]Bellatrix then separated Hermione for interrogation while the others were locked in the cellar with the other prisoners. In a blind panic, Harry scrambled in his bag for the shard of [[Two-way mirror|mirror]] and called out for help, and [[Dobby]] soon appeared in the cellar.<ref name="DH23" /> With Dobby's help, Harry managed to orchestrate their escape. In the ensuing [[Skirmish at Malfoy Manor|skirmish]], Ron saved Hermione while Harry defeated [[Draco Malfoy]] and took many wands from him.<ref name="DH23" /> Unfortunately, Dobby was killed in the escape. While overcome with grief for Dobby, Harry dug his grave and thought about the events of the day. He came to the conclusion that Voldemort had asked Bellatrix to store one of his Horcruxes at [[Gringotts Wizarding Bank]].<ref name="DH24">''[[Harry Potter and the Deathly Hallows]]'' - Chapter 24 (''The Wandmaker'')</ref> |
||
| + | {{Main|Break-in of Gringotts Wizarding Bank (1998)}} |
||
| + | {{Quote|Remember the cup's small and gold, it's got a badger engraved on it, two handles —|[[Harry Potter]] describing the cup|Harry Potter and the Deathly Hallows}} |
||
| + | After escaping [[Malfoy Manor]] to the safe haven of [[Shell Cottage]], owned by Bill and Fleur, Harry negotiated with the goblin [[Griphook]] to break into the Lestrange vault, where he believed there might be a Horcrux. Griphook agreed, but only if Harry would give him Gryffindor's sword. Harry, reluctantly, conceded.<ref name="DH24" /> The next month was spent planning the heist. They decided to use what was left of their store of [[Polyjuice Potion]] to transform Hermione into Bellatrix. Since they had her real wand, Harry thought the disguise would be pretty convincing.<ref name="DH25">{{DH|B|25}}</ref> Ron was to be transfigured into a foreign wizard they called "Dragomir Despard."<ref name="DH26">{{DH|B|26}}</ref> Harry and Griphook went under the [[Cloak of Invisibility]]. |
||
| + | [[File:Trio_in_vault.jpg|250px|thumb|left|The trio in the Lestrange vault looking for the cup]] |
||
| − | ===Break-into Gringotts Wizarding Bank=== |
||
| + | Arriving on [[Diagon Alley]], they were promptly joined by [[Travers]], another Death Eater, who began asking too many questions to be comfortable with. However, they managed to escape Travers and get inside the Lestrange vault, but Harry had to perform the [[Imperius Curse]] multiple times to ensure their access without being noticed. Unfortunately, they were detected, and their covers blown.<ref name="DH26" /> Once inside they discovered that the treasure had been protected with [[Doubling Charm|Geminio]] and [[Flagrante Curse|Flagrante]] spells. Harry found Hufflepuff's cup in the vault and was able to obtain it, but they had to escape on a [[Gringott's Dragon|Ukrainian Ironbelly]], when Griphook took the sword and abandoned them.<ref name="DH26" /> |
||
| − | [[File:Cuupp.jpg|thumb|120px|left|[[Helga Hufflepuff's Cup]]]]{{Main|Break-In of Gringotts Wizarding Bank (1998)}} |
||
| − | |||
| − | After escaping [[Malfoy Manor]] to the safe haven of [[Shell Cottage]], owned by [[William Weasley|Bill]] and [[Fleur Delacour|Fleur]], Harry negotiated with the [[goblin]] [[Griphook]] to break into the Lestrange vault, where he believed there might be a Horcrux. Griphook agreed, but only if Harry would give him Gryffindor's sword. Harry, reluctantly, conceded.<ref name="DH24" /> The next month was spent planning the heist. They decided to use what was left of their store of [[Polyjuice Potion]] to transform Hermione into Bellatrix. Since they had her real wand, Harry thought the disguise would be pretty convincing.<ref name="DH25">''[[Harry Potter and the Deathly Hallows]]'' - Chapter 25 (''Shell Cottage'')</ref> Ron was to be [[Transfiguration|transfigured]] into a foreign wizard they called "Dragomir Despard."<ref name="DH26">''[[Harry Potter and the Deathly Hallows]]'' - Chapter 26 (''Gringotts'')</ref> Harry and Griphook went under the [[Cloak of Invisibility]]. |
||
| − | |||
| − | [[File:Bellatrix_Lestrange's_Vault_DH2.jpg|thumb|The trio in the [[Lestrange Vault]].]]Arriving on [[Diagon Alley]], they were promptly joined by [[Travers]], another Death Eater, who began asking too many questions to be comfortable with. However, they managed to escape Travers and get inside the Lestrange vault, but Harry had to perform the [[Imperius Curse]] multiple times to ensure their access without being noticed. Unfortunately, they were detected, and their covers blown.<ref name="DH26" /> Once inside they discovered that the treasure had been protected with [[Geminio]] and [[Flagrante]] spells. Harry found Hufflepuff's cup in the vault and was able to obtain it, but they had to escape on a [[Ukrainian Ironbelly at Gringotts|dragon]], when Griphook took the sword and abandoned them.<ref name="DH26" /> |
||
| − | |||
| − | ===Battle of Hogwarts=== |
||
| − | [[File:HarryLunaFinalBattle.jpg|thumb|Harry and Luna entering the Ravenclaw Tower corridor.]] |
||
| + | ====Battle of Hogwarts==== |
||
{{Main|Battle of Hogwarts}} |
{{Main|Battle of Hogwarts}} |
||
| + | {{Quote|I know that you are preparing to fight. Your efforts are futile. You cannot fight me. I do not want to kill you. I have great respect for the teachers of Hogwarts. I do not want to spill magical blood. Give me Harry Potter, and none shall be harmed. Give me Harry Potter, and I shall leave the school untouched. Give me Harry Potter, and you will be rewarded. You have until midnight.|[[Tom Riddle|Lord Voldemort]]'s ultimatum leading up to the final battle|Harry Potter and the Deathly Hallows}} |
||
| + | [[File:Battle of Hogwarts - DHF2.jpg|250px|thumb|Battle of Hogwarts]] |
||
| + | Harry had a vision soon after the Gringotts break-in. He saw the locations of all the Horcruxes.<ref name="DH27">{{DH|B|27}}</ref> He was vindicated in the eyes of Ron and Hermione when he discovered that Hogwarts was the home of one of the Horcruxes. This was an idea he had been pushing for months. |
||
| − | + | The trio decided to go to [[Hogsmeade]] immediately to gain entrance to the castle. They found a passage from the [[Hog's Head]] to the Room of Requirement.<ref name="DH28">{{DH|B|28}}</ref> |
|
| − | ====Search for the Diadem==== |
||
| + | =====Search for the Diadem===== |
||
| − | Upon entrance to the [[Hogwarts Castle|castle]], Harry set off with [[Luna Lovegood]] to see what Ravenclaw's diadem looked like, while Ron and Hermione, unbeknownst to Harry, went to the [[Chamber of Secrets]]. There was a bust of the diadem in the common room of [[Ravenclaw Tower]].<ref name="DH29">''[[Harry Potter and the Deathly Hallows]]'' - Chapter 29 (''The Lost Diadem'')</ref> They went under the [[Cloak of Invisibility|Invisibility cloak]], and when they reached the door, Harry found out that a riddle had to be answered to gain entrance to the common room. Thankfully, Luna was able to answer the riddle and Harry left the safety of the cloak to get a better look at the diadem. |
||
| + | {{Quote|Voldemort thought I'd go to Ravenclaw Tower. There it was: a solid fact, the place to start. Voldemort had stationed Alecto Carrow in the Ravenclaw common room, and there could only be one explanation: Voldemort feared that Harry already knew his Horcrux was connected to that House. But the only object anyone seemed to associate with Ravenclaw was the lost diadem... and how could the Horcrux be the diadem? How was it possible that Voldemort, the Slytherin, had found the diadem that had eluded generations of Ravenclaws? Who could have told him where to look, when nobody had seen the diadem in living memory?|Harry Potter deducing the location of Ravenclaw's Diadem|Harry Potter and the Deathly Hallows}} |
||
| + | [[File:Deathly-hallows-part2-still07.jpg|250px|thumb|left|Harry and Luna entering [[Ravenclaw Tower]]]] |
||
| + | Upon entrance to the castle, Harry set off with [[Luna Lovegood]] to see what Ravenclaw's diadem looked like, while Ron and Hermione, unbeknownst to Harry, went to the [[Chamber of Secrets]]. There was a bust of the diadem in the common room of Ravenclaw Tower.<ref name="DH29">{{DH|B|29}}</ref> They went under the [[Cloak of Invisibility|Invisibility Cloak]], and when they reached the door, Harry found out that a riddle had to be answered to gain entrance to the common room. Thankfully, Luna was able to answer the riddle and Harry left the safety of the cloak to get a better look at the diadem. |
||
| − | + | He was surprised by [[Alecto Carrow]], who pressed her [[Dark Mark]].<ref name="DH29" /> Luna then stunned Carrow, and Harry hid back underneath the cloak. [[Amycus Carrow]] and [[Minerva McGonagall]] entered the common room and found Alecto passed out on the ground. They argued about what to do. When Amycus spat in McGonagall's face, Harry used the [[Cruciatus Curse]] on him until he passed out. Harry then left with McGonagall as she prepared the castle for the coming siege.<ref name="DH30">{{DH|B|30}}</ref> |
|
| − | [[File: |
+ | [[File:Harry and Helena1.jpg|250px|thumb|Helena Ravenclaw telling Harry her history with the diadem]] |
| + | In his search for Ron and Hermione, Harry ran into [[Nicholas de Mimsy-Porpington|Nearly Headless Nick]]. At this, he realised that the [[Helena Ravenclaw|Grey Lady]] might know about the diadem.<ref name="DH31" /> When he found her, she was initially reluctant to give him information, but in the end she told him that she had stolen the diadem from her mother and that it was left in [[Albania]] where she died. She revealed that only once did she tell this story to someone. Harry thought that Riddle had charmed the story out of her.<ref name="DH31" /> When Harry saw a pair of fallen gargoyles, he had a brain wave. The diadem had been hidden in the [[Room of Requirement]] in the same place Harry had hidden the Half-Blood Prince's book. |
||
| + | =====Destruction of Hufflepuff's Cup===== |
||
| − | In his search for Ron and Hermione, Harry ran into [[Nicholas de Mimsy-Porpington|Nearly Headless Nick]]. At this, he realised that the [[Helena Ravenclaw|Grey Lady]] might know about the diadem.<ref name="DH31" /> When he found her, she was initially reluctant to give him information, but in the end she told him that she had stolen the diadem from her mother and that it was left in [[Albania]] where she died. She revealed that only once did she tell this story to someone. Harry thought that Riddle had charmed the story out of her.<ref name="DH31" /> When Harry saw a pair of fallen gargoyles, he had a brain wave. The diadem had been hidden in the [[Room of Requirement]] in the same place Harry had hidden the [[Severus Snape's copy of Advanced Potion-Making|Half-Blood Prince's book]]. |
||
| + | {{Quote|So we're another Horcrux down. Hermione stabbed it. Thought she should. She hasn't had the pleasure yet.|Hermione Granger destroyed Hufflepuff's Cup with a Basilisk fang|Harry Potter and the Deathly Hallows}} |
||
| + | [[File:Harry-potter7-movie-screencaps.com-6084.jpg|250px|thumb|left|Hermione and Ron destroying the cup while in the Chamber of Secrets]] |
||
| + | When he reached the Room of Requirement, he found Ron and Hermione and was told that the cup was destroyed. While Harry was searching for the unknown third Horcrux, Ron and Hermione decided to get rid of the cup. They had the inspiration to get Basilisk fangs from the [[Chamber of Secrets]]. |
||
| + | Ron was able to imitate [[Parseltongue]], and thus opened the entrance of the Chamber, which was located in the second floor girl's bathroom. Within the main Chamber he and Hermione acquired the fangs from the Basilisk's skeleton. Ron suggested Hermione destroy the Horcrux, as she had not destroyed one yet. Hermione stabbed it, thus destroying it beyond magical repair. After they left the Chamber they reunited with Harry, who was on his way to the [[Room of Requirement]] to look for the Diadem.<ref name="DH31">{{DH|B|31}}</ref> |
||
| − | ====Destruction of Hufflepuff's Cup==== |
||
| + | =====Skirmish in the Room of Requirement===== |
||
| − | [[File:Cupp.jpg|thumb|left|Hermione prepares to destroy the Cup]]When he reached the Room of Requirement, he found Ron and Hermione and was told that the cup was destroyed. While Harry was searching for the unknown third Horcrux, Ron and Hermione decided to get rid of the cup. They had the inspiration to get basilisk fangs from the [[Chamber of Secrets]]. Ron was able to imitate [[Parseltongue]], and he and Hermione found some fangs. Hermione destroyed the cup, and they reunited with Harry, who was on his way to the [[Room of Requirement]].<ref name="DH31">''[[Harry Potter and the Deathly Hallows]]'' - Chapter 31 (''The Battle of Hogwarts'')</ref>. |
||
| − | |||
| − | ====Skirmish in the Room of Requirement==== |
||
{{Main|Skirmish at the Room of Requirement}} |
{{Main|Skirmish at the Room of Requirement}} |
||
| + | {{Quote|A bloodlike substance, dark and tarry, seemed to be leaking from the diadem. Suddenly Harry felt the thing vibrate violently, then break apart in his hands, and as it did so, he thought he heard the faintest, most distant scream of pain, echoing not from the grounds or the castle, but from the thing that had just fragmented in his fingers.|Description of the diadem's destruction|Harry Potter and the Deathly Hallows}} |
||
| + | [[File:Harry and Draco.png|250px|thumb|right|Harry and Malfoy escaping the [[Fiendfyre]] in the Room of Requirement]] |
||
| + | When they all entered the Room of Requirement, they split up to search for the diadem. Harry found it, but before he could get it, he was ambushed by [[Draco Malfoy]], [[Gregory Goyle]], and [[Vincent Crabbe]].<ref name="DH31" /> During a brief skirmish in which Crabbe and Goyle had aimed to kill, Crabbe used [[Fiendfyre]], but he could not control it. While the trio tried to escape, they found two old brooms. Harry mounted one and Ron and Hermione took the other. |
||
| + | As they were flying away, they saw Malfoy and a hurt Goyle standing in the fire. Harry saved Malfoy and grabbed the diadem as it was falling. They escaped the room and examined the diadem which had been destroyed by the cursed fire.<ref name="DH31" /> Crabbe had died at the hands of his own curse. |
||
| − | {{Quote|Like it hot, scum?|[[Vincent Crabbe]], just before destroying the diadem|Harry Potter and the Deathly Hallows}} |
||
| + | =====Harry's sacrifice===== |
||
| − | [[File:Fiendfyregoyle.jpg|thumb|Ron and Hermione running from Fiendfyre in the Room of Requirement.]] |
||
| + | {{Quote|You were the seventh Horcrux, Harry, the Horcrux he never meant to make.|Dumbledore and Harry speaking in the limbo about the Horcruxes|Harry Potter and the Deathly Hallows}} |
||
| + | [[File:Harry Potter being "killed".gif|250px|thumb|left|Harry willingly letting Voldemort hit him with the Killing Curse]] |
||
| + | While the battle was still in full swing, Harry, Ron, and Hermione ventured down to the [[Shrieking Shack]]. They knew that was where Voldemort was located and believed that [[Nagini]] would be with him. After witnessing Nagini kill [[Severus Snape]], Harry collected a string of memories from the dying man.<ref name="DH32">{{DH|B|32}}</ref> During a one hour ceasefire, Harry discovered that ''he'' was an unintended Horcrux from Snape's memories. In order to destroy Voldemort, he had to allow the Dark Lord to kill him. Harry also found out that Severus Snape was loyal to Dumbledore after all, because he had been in love with Harry's [[Lily J. Potter|mother]] and that Dumbledore was dying and asked Snape to kill him.<ref name="DH33">{{DH|B|33}}</ref> |
||
| + | Harry left the castle under his [[Cloak of Invisibility]]. Along the way he entrusted [[Neville Longbottom]] to kill Nagini. He followed two [[Death Eaters]] back to their camp. There, he willingly let Voldemort kill him, fully intending to die.<ref name="DH34">{{DH|B|34}}</ref> Fortunately, the blood from Harry in Voldemort allowed Harry to survive, while the piece of Voldemort's [[soul]] inside him was destroyed.<ref name="DH35" /> |
||
| − | When they all entered the Room of Requirement, they split up to search for the diadem. Harry found it, but before he could get it, he was ambushed by [[Draco Malfoy]], [[Gregory Goyle]], and [[Vincent Crabbe]].<ref name="DH31" /> During a brief skirmish in which Crabbe and Goyle had aimed to kill, Crabbe used [[Fiendfyre]], but he could not control it. While the trio tried to escape, they found two old brooms. Harry mounted one and Ron and Hermione took the other. As they were flying away, they saw Malfoy and a hurt Goyle standing in the fire. Harry saved Malfoy and grabbed the diadem as it was falling. They escaped the room and examined the diadem which had been destroyed by the cursed fire.<ref name="DH31" /> |
||
| − | ==== |
+ | =====Slaying of Nagini===== |
| + | {{Dialogue a-b-a|Harry Potter|You know Voldemort's snake. Neville? He's got a huge snake. Calls it Nagini|Neville Longbottom|I've heard, yeah. What about it?|It's got to be killed.|Harry entrusting Neville with the task of slaying Nagini|Harry Potter and the Deathly Hallows}} |
||
| + | [[File:Neville kills Nagini.gif|250px|thumb|Neville killing Nagini using the [[Sword of Gryffindor]]]] |
||
| + | With Harry feigning death, the [[Death Eaters]] marched back to the castle and demanded its surrender. Harry knew that the Horcrux inside him was destroyed, but one Horcrux still remained to be destroyed: Voldemort's enormous serpent, [[Nagini]]. The defenders of the castle filed out onto the grounds to face the approaching army. Believing Harry to be dead, [[Neville Longbottom]] lunged at Voldemort and swore that he would only join him when "''hell freezes over''".<ref name="DH36">{{DH|B|36}}</ref> In response, Voldemort cast a [[Full Body-Bind Curse]] on Neville, then placed the [[Sorting Hat]] on his head and set it ablaze. |
||
| + | At the same time, the centaurs and other creatures from the [[Forbidden Forest]] attacked the Death Eaters. In the chaos, Neville withdrew Gryffindor's sword from the hat and decapitated Nagini, who had been set free of the protection that she had been under earlier.<ref name="DH36" /> With Nagini dead, all of the Horcruxes had been destroyed. |
||
| − | {{Quote|You were the seventh Horcrux, Harry, the Horcrux he never meant to make.|Dumbledore talking to Harry in [[King's Cross]]|Harry Potter and the Deathly Hallows}} |
||
| + | =====Voldemort's death===== |
||
| − | [[File:DH_-_Harry_Potter-Forbidden_Forest.jpg|thumb|left|Harry gives himself up to Voldemort]] |
||
| + | {{Main|Duel in the Great Hall}} |
||
| − | While the battle was still in full swing, Harry, Ron, and Hermione ventured down to the [[Shrieking Shack]]. They knew that was where Voldemort was located and believed that [[Nagini]] would be with him. After witnessing Nagini kill [[Severus Snape]], Harry collected a string of memories from the dying man.<ref name="DH32">''[[Harry Potter and the Deathly Hallows]]'' - Chapter 32 (''The Elder Wand'')</ref> During a one hour ceasefire, Harry discovered that ''he'' was an unintended Horcrux from Snape's memories. In order to destroy Voldemort, he had to allow the Dark Lord to kill him. Harry also found out that Severus Snape was loyal to Dumbledore after all, because he had been in love with Harry's [[Lily Evans|mother]].<ref name="DH33" /> |
||
| + | {{Quote|There are no more Horcruxes. It's just you and me now, Riddle. Neither can live while the other survives, and one of us is about to leave for good.| Harry Potter and Voldemort's final discussion with each other|Harry Potter and the Deathly Hallows}} |
||
| + | [[File:Voldemort vanquished.png|250px|thumb|left|Lord Voldemort being defeated by Harry Potter for the final time]] |
||
| + | A few minutes later, Harry revealed himself and faced Voldemort. He explained everything to Voldemort - Snape's true loyalty, Dumbledore's plan, and the Elder Wand's true master (first Draco, now Harry himself), and even offered Voldemort the chance for trying to be remorseful, which Voldemort refused. Having been told of his mistakes, Voldemort tried to kill Harry with the [[Killing Curse]] once and for all, but all did not go according to plan. |
||
| + | When Voldemort tried to kill Harry with the Elder Wand, Harry's mastery of the Elder Wand (which he obtained earlier by [[Disarming Charm|Disarming]] the previous master, [[Draco Malfoy]]) caused the Elder Wand to refuse to harm its true master: the Killing Curse rebounded, the Elder Wand went soaring through the air into Harry's hand, and Voldemort was destroyed once and for all.<ref name="DH36" /> |
||
| − | {{Quote|Voldemort had raised his wand. His head was still tilted to one side, like a curious child, wondering what would happen if he proceeded. Harry looked back into the red eyes, and wanted it to happen now, quickly, while he could still stand, before he lost control, before he betrayed fear -- He saw the mouth move and a flash of green light, and everything was gone.|Voldemort killing Harry and inadvertantly destroying one of his own Horcruxes.|Harry Potter and the Deathly Hallows}} |
||
| + | ===Alternate reality=== |
||
| − | [[File:Avadakedavra.png|thumb|Voldemort hitting Harry with the Killing Curse]]Harry left the castle under his [[Cloak of Invisibility]]. Along the way he entrusted [[Neville Longbottom]] to kill Nagini. He followed two [[Death Eaters]] back to their camp. There, he willing let Voldemort kill him, fully intending to die.<ref name="DH34">''[[Harry Potter and the Deathly Hallows]]'' - Chapter 34 (''The Forest Again'')</ref> Fortunately, the [[blood]] from Harry in Voldemort allowed Harry to survive, while the piece of Voldemort's [[soul]] inside him was destroyed.<ref name="DH35" /> |
||
| + | In [[2020]], Lord Voldemort and [[Bellatrix Lestrange]]'s daughter [[Delphini]] tricked [[Scorpius Malfoy]] and [[Albus Potter]] into going back in time and preventing the death of [[Cedric Diggory]]. Due to Cedric's humiliation during the Second Task of the [[Triwizard Tournament]], he ended up joining the Death Eaters. While most if not all of the rest of the Horcrux hunt likely went the same, Cedric's survival caused one crucial alteration: Cedric killed [[Neville Longbottom]] during the [[Battle of Hogwarts]] and thus [[Nagini]] was never killed. |
||
| − | |||
| − | ====Killing of Nagini==== |
||
| − | |||
| − | {{dialogue a-b-a|Harry|You know Voldemort’s snake. Neville? He’s got a huge snake. Calls it Nagini|Neville|I’ve heard, yeah. What about it?|It’s got to be killed.|Harry asking Neville to kill Nagini|Harry Potter and the Deathly Hallows}} |
||
| − | |||
| − | [[File:Serp.jpg|thumb|Nagini]] |
||
| − | With Harry feigning death, the [[Death Eaters]] marched back to the castle and demanded its surrender. Harry knew that the Horcrux inside him was destroyed, but one Horcrux still remained to be destroyed: Voldemort's enormous serpent, [[Nagini]]. The defenders of the castle filed out onto the grounds to face the approaching army. Believing Harry to be dead, [[Neville Longbottom]] lunged at Voldemort and swore that he would only join him when "hell freezes over."<ref name="DH36">''[[Harry Potter and the Deathly Hallows]]'' - Chapter 36 (''The Flaw in the Plan'')</ref> In response, Voldemort cast a [[Full Body-Bind Curse]] on Neville, then placed the [[Sorting Hat]] on his head and set it ablaze. |
||
| − | |||
| − | [[File:Ty56y56546.jpg|thumb|left|[[Nagini]] is killed by [[Neville Longbottom]]]]At the same time, the [[centaur]]s and other creatures from the [[Forbidden Forest]] attacked the Death Eaters. In the chaos, Neville withdrew Gryffindor's sword from the hat and decapitated [[Nagini]], who had been set free of [[Protection orb|the protection]] that she had been under earlier.<ref name="DH36" /> With Nagini dead, all of the Horcruxes had been destroyed. |
||
| − | |||
| − | ====Voldemort's Death==== |
||
| − | {{main|Duel in the Great Hall}} |
||
| − | |||
| − | {{Quote|[[Killing Curse|Avada Kedavra]]!|[[Tom Riddle|Voldemort]]'s final words.|Harry Potter and the Deathly Hallows}} |
||
| − | [[File:HarryElderWand.png|thumb|250px|Harry Potter holding the Elder Wand after defeating Voldemort.]] |
||
| − | |||
| − | A few minutes later, Harry revealed himself and faced Voldemort. He explained everything to Voldemort - Snape's true loyalty, Dumbledore's plan, and the Elder Wand's true master (first Draco, now Harry himself), and even offered Voldemort the chance for trying to be remorseful, which Voldemort refused. Having been told of his mistakes, Voldemort tried to kill Harry with the [[Killing Curse]] once and for all, but all did not go according to plan. |
||
| + | As a result, Harry was unable to kill Voldemort and was thus killed instead, creating an [[alternate reality]] where Voldemort ruled. This reality was negated when Scorpius, with the help of the alternate [[Hermione Granger]], [[Ron Weasley]] and [[Severus Snape]], travelled back in time once again and set things right.<ref>''[[Harry Potter and the Cursed Child]]''</ref> |
||
| − | When Voldemort tried to kill Harry with the Elder Wand, Harry's mastery of the Elder Wand (which he obtained earlier by [[Disarming Charm|Disarming]] the previous master, [[Draco Malfoy]]) caused it so that the Elder Wand refused to harm its true master: the Killing Curse rebounded, the Elder Wand went soaring through the air into Harry's hand, and Voldemort was destroyed once and for all.<ref name="DH36" /> |
||
==See also== |
==See also== |
||
| − | [[File:Harry's_Diary.png|thumb|250px|Harry's notes on Horcruxes.]] |
||
*[[Horcrux]] |
*[[Horcrux]] |
||
*[[Tom Riddle]] |
*[[Tom Riddle]] |
||
| Line 206: | Line 208: | ||
==Appearances== |
==Appearances== |
||
| + | *{{COS}} {{1st}} |
||
| − | *''[[Harry Potter and the Chamber of Secrets]]'' {{1st}} |
||
| + | *{{COS|F}} |
||
| − | *''[[Harry Potter and the Chamber of Secrets (film)]]'' |
||
| + | *{{HBP}} |
||
| − | *''[[Harry Potter and the Half-Blood Prince]]'' |
||
| + | *{{HBP|F}} |
||
| − | *''[[Harry Potter and the Half-Blood Prince (film)]]'' |
||
| + | *{{HBP|G}} |
||
| − | *''[[Harry Potter and the Half-Blood Prince (video game)]]'' |
||
| + | *{{DH}} |
||
| − | *''[[Harry Potter and the Deathly Hallows]]'' |
||
| + | *{{DH|F1}} |
||
| − | *''[[Harry Potter and the Deathly Hallows: Part 1]]'' |
||
| + | *{{DH|G1}} |
||
| − | *''[[Harry Potter and the Deathly Hallows: Part 1 (video game)]]'' |
||
| + | *{{DH|F2}} |
||
| − | *''[[Harry Potter and the Deathly Hallows: Part 2]]'' |
||
| + | *{{DH|G2}} |
||
| − | *''[[Harry Potter and the Deathly Hallows: Part 2 (video game)]]'' |
||
| + | *{{LEGO|Y2}} |
||
| − | *''[[LEGO Harry Potter: Years 5-7]]'' |
||
| + | *{{HPV|CH}} |
||
| + | *{{HPV|CR}} |
||
==Notes and references== |
==Notes and references== |
||
{{Reflist}} |
{{Reflist}} |
||
| + | [[pl:Poszukiwanie horkruksów Lorda Voldemorta]] |
||
| − | [[Category:Second Wizarding War]] |
||
| + | [[ru:Охота за Крестражами]] |
||
[[Category:Horcrux hunt]] |
[[Category:Horcrux hunt]] |
||
Latest revision as of 12:36, 17 April 2024

|
"Are you a wizard, or what?"
The title of this article is conjectural. Although it is based on canonical information, the actual name is a conjecture and may be supplanted at any time by additional information released from canonical sources. If this occurs, please move this page to the appropriate title. |
- "There are no more Horcruxes. It's just you and me. Neither can live while the other survives, and one of us is about to leave for good..."
- — Harry Potter to Voldemort regarding the destruction of all the Horcruxes[src]
The Horcrux hunt was a mission started by Albus Dumbledore and given to Harry Potter in June of 1997 to find all of Lord Voldemort's remaining Horcruxes and destroy them. Albus Dumbledore began this quest in July of 1996 when he sought out and destroyed Marvolo Gaunt's Ring located in the Gaunt shack. After his death at the hands of Severus Snape during the Battle of the Astronomy Tower, the mission fell to Harry Potter to complete.
Harry was joined by Hermione Granger and Ron Weasley, and they set off in the aftermath of Bill Weasley and Fleur Delacour's wedding. The hunt was difficult and took a mental and emotional toll on the trio. They eventually destroyed all of the Horcruxes by 2 May 1998. The hunt ended with the death of Lord Voldemort at the hands of Harry Potter at the end of the Battle of Hogwarts.
History
Background information
Creation of the Horcruxes
- "Sir, I wondered what you know about... about Horcruxes?"
- — Tom Riddle asks about Horcruxes to his potions teacher, Horace Slughorn[src]
Obsessed with immortality from a young age, Lord Voldemort created a series of Horcruxes in an effort to prevent his death.[1] A Horcrux is a vessel into which one places a piece of one's soul to protect one from mortal death.[1] Tom Riddle created his first Horcrux around the age of 16, and this became known as Tom Riddle's Diary. He used the death of a Muggle-born student named Myrtle Warren to create it, whom he had killed with Slytherin's Basilisk, while she was in the girls lavatory.
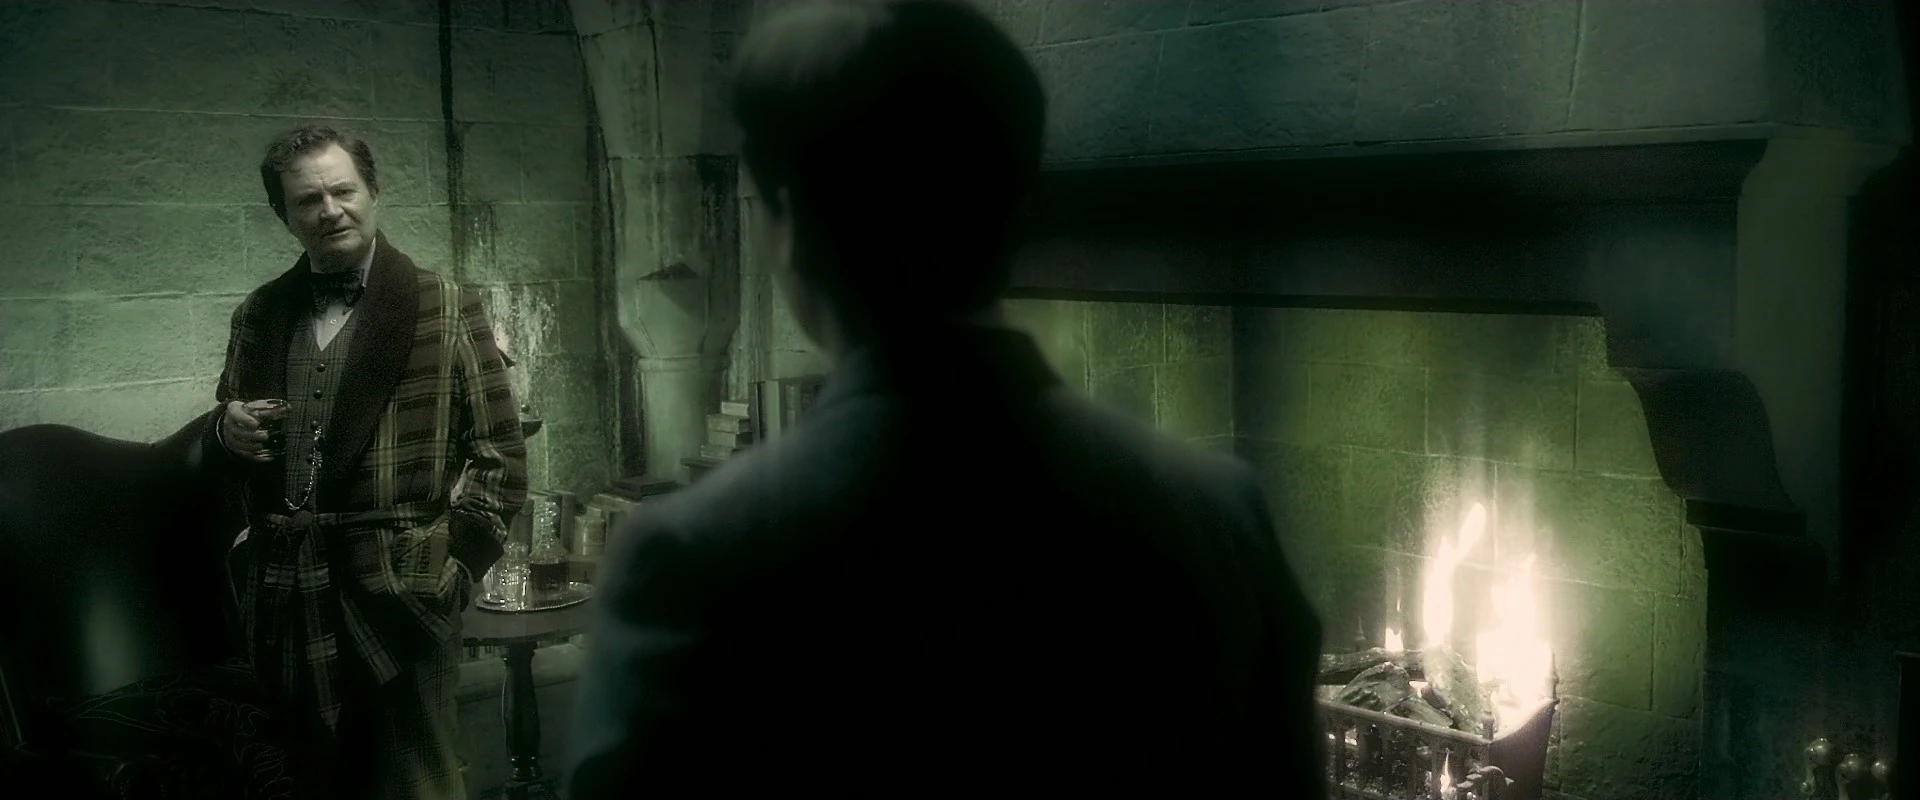
Riddle discussing Horcruxes with Slughorn
The following school year, Tom asked Horace Slughorn, his Potions professor, about Horcruxes and learned that it was indeed possible to create more than one. Over the ensuing years using the murders of Muggles and wizards alike, he created four more Horcruxes. These were Marvolo Gaunt's Ring, Slytherin's Locket, Hufflepuff's Cup, and Ravenclaw's Diadem. He believed seven to be a magically powerful number and wished to create a seven part soul, but he seemed to save the creation of Horcruxes for murders he considered significant.[1]
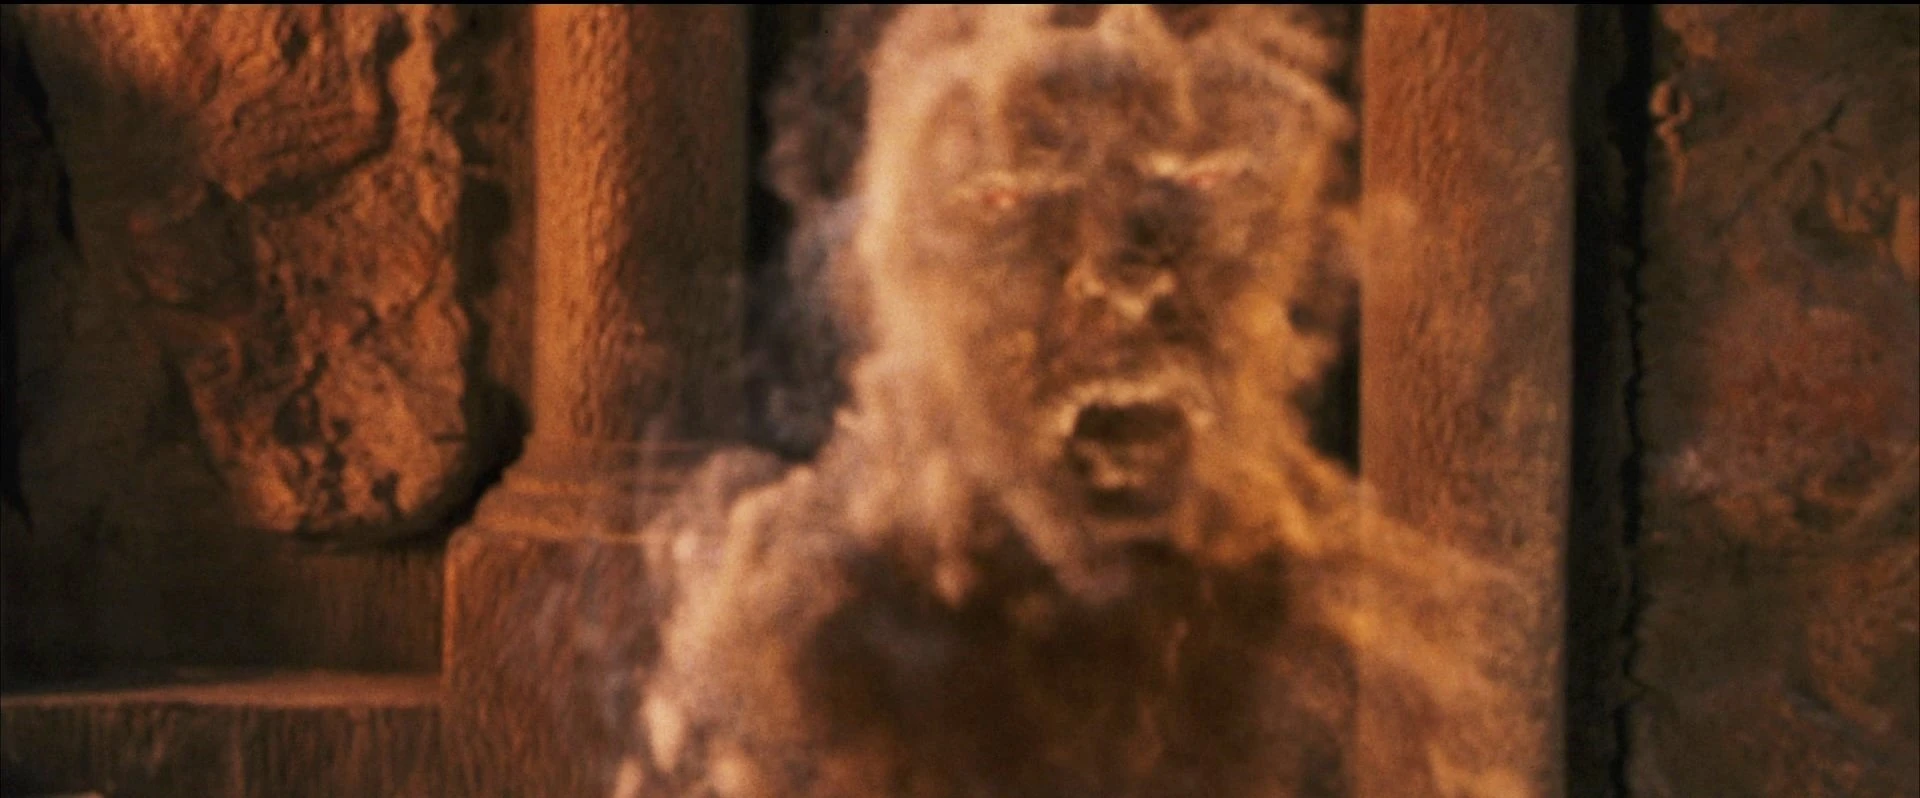
Voldemort's twisted and mangled soul
As of Hallowe'en 1981, he had a six part soul with five finished Horcruxes, but the process had rendered his remaining soul very unstable. That evening, Lord Voldemort went to destroy Harry Potter, whom he believed to be the subject of a prophecy. This prophecy predicted that Harry may be the one with the power to destroy him. When Voldemort's unstable soul was struck with his rebounding curse, a part of it shattered off, and attached itself to Harry.[2] Sometime after his resurrection, Voldemort created a sixth intentional Horcrux by turning his snake, Nagini, into a Horcrux.[1] As of this point, he had a seven part soul, due to the prior destruction of Tom Riddle's diary.
Quirrell as a temporary Horcrux
- "What is this magic?!"
- — Quirrell reacting to Harry's hands in the Underground Chambers[src]
Quirrell was able to penetrate the first six chambers that protected the Philosopher's Stone with mild difficulty, including the chamber in which he himself put a Troll. He reached the final chamber only to find the Mirror of Erised, and was unable to figure out how to take the Stone from it, going so far as to consider smashing the mirror.
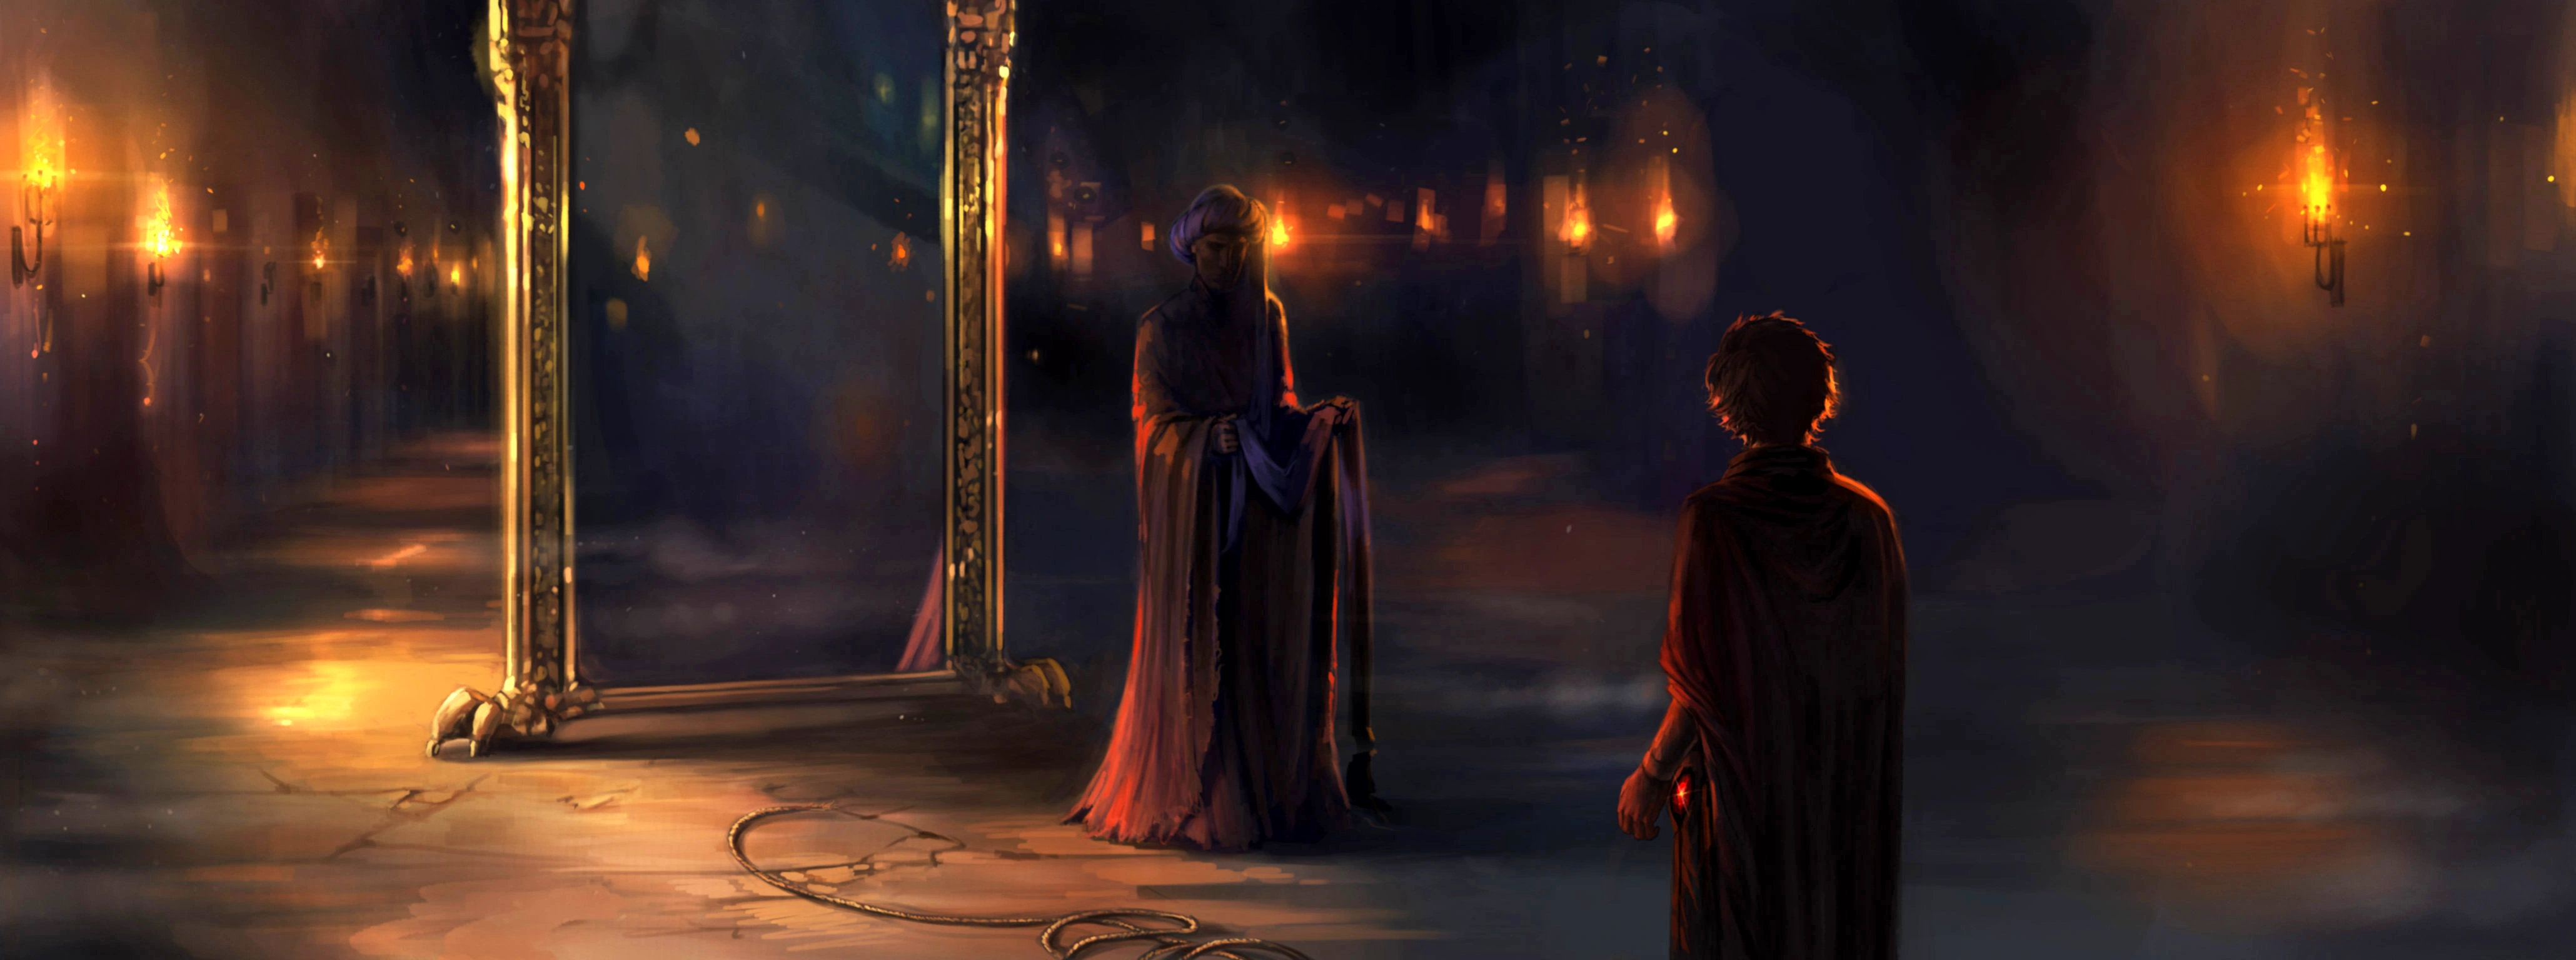

Quirrell and Voldemort in confrontation, while in the Underground Chambers
Eventually, Harry alone managed to reach the last chamber, and was surprised to meet Quirrell instead of Snape. Quirrell non-verbally bound Harry and summoned a wall of fire behind the door to prevent him from escaping, then, on Voldemort's command, forced Harry to look into the mirror. Harry saw his reflection with the Stone in his own trousers' pocket, and felt it indeed being transferred to his real pocket. When Harry lied about what he saw in the mirror, Quirrell unwrapped his turban to reveal Lord Voldemort's face, bound to the back of his head. Quirrell and Harry struggle for possession of the Stone.

Harry's touch burning Quirrell, causing him to die
Quirrel's life ended then, when Voldemort forced him to attempt the murder of Harry Potter (deducing that Harry had the Stone and being unable to persuade him to give it willingly). Unfortunately, the body Quirrell and Voldemort were both sharing manifested in burns and blisters during his fight with Harry due to the protective power Harry's mother left in his skin when she died for him. It was consequently burned so horribly that Quirrell collapsed and died (Voldemort, however, was merely dispossessed and fled). However, despite being effectively turned into a living Horcrux — like Nagini — for the last year of his life, Quirrell did not ultimately lose his soul, having even tried to put up feeble resistance on occasion (in spite of the fact that Voldemort was far too strong for him).
Albus Dumbledore discovering the secret
Harry destroying Tom Riddle's diary
- "Funny the damage a silly, little book can do. Especially in the hands of a silly, little girl."
- — Lord Voldemort[src]
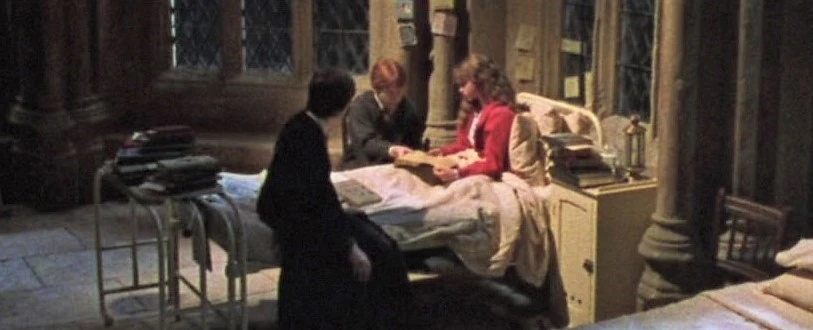

The trio discussing the diary after finding it in a washroom
In 1993, Hogwarts School of Witchcraft and Wizardry was under siege from an unseen terror. The Chamber of Secrets had been opened once more and the terror within unleashed upon the school's population.[3] After several students had been petrified, Harry Potter and his best friends Ron Weasley and Hermione Granger managed to solve the mystery. After discovering a few cryptic clues and a mysterious diary, they realised that the monster that had been petrifying the students was a Basilisk and that the entrance to the Chamber was located in Myrtle Warren's bathroom.[4] Unfortunately, Hermione also became a victim of the Basilisk before they could solve the mystery.
When Ginny Weasley was taken into the Chamber by the monster, Harry and Ron went to find her. They attempted to give their information to Gilderoy Lockhart, who had been tasked with finding Ginny, only to find out that he was fraud and that he was about to flee the castle. At wand point, Harry and Ron took Lockhart to Myrtle's bathroom and discovered the entrance to the Chamber of Secrets.[4] After the three of them entered the Chamber, Lockhart attempted to erase the memories of Harry and Ron. The wand backfired, causing Lockhart permanent mental damage and a cave in. While Ron created an exit through the rocks, Harry ventured deeper into the Chamber.[4]

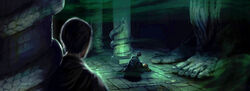
Harry with an unconscious Ginny lying in the Chamber of Secrets
Harry discovered Ginny laying on the ground and was informed by Tom Riddle, the boy from the mysterious diary, that she was almost dead. When Harry tried to warn Tom of the great danger, Tom explained that he was the great danger, being the boy who would become Lord Voldemort. He then summoned the Basilisk from the depths of the Chamber.[5] Harry was able to kill the Basilisk with the aid of Fawkes, Dumbledore's pet phoenix. However, Harry was badly injured by a Basilisk fang. Fawkes healed Harry's wound, but Riddle was still about to kill Harry with his own wand.
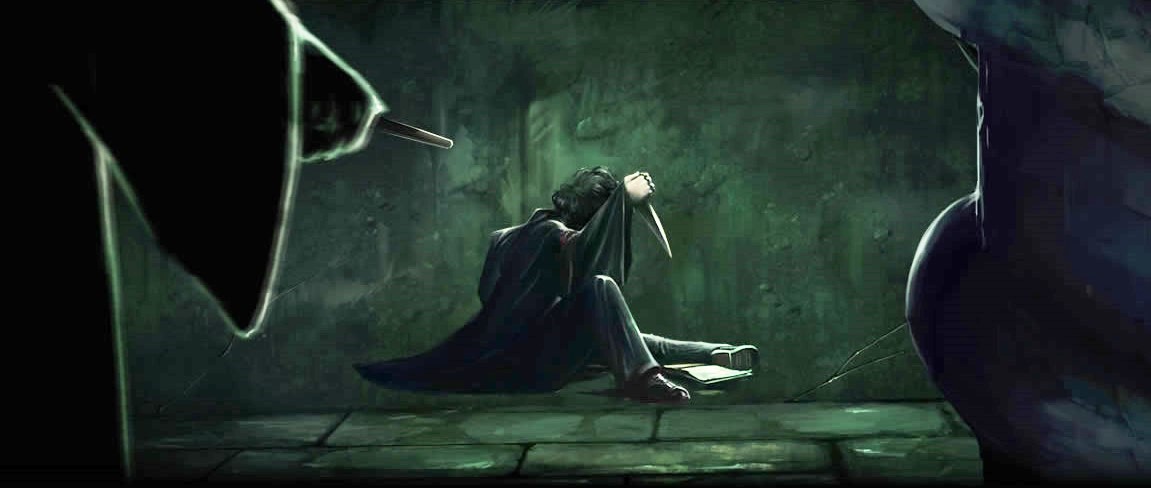
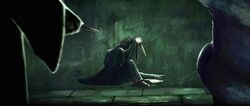
Harry stabbing the diary with a Basilisk fang
At that moment Fawkes swept Riddle's diary into Harry's hands, and Harry stabbed the diary with a fang.[5] He did this instinctively, without any prior knowledge that it would destory the diary. Riddle disappeared, and Ginny's vitality was restored. She explained to Harry that she had been setting the Basilisk on the student population, because she had been possessed by Tom Riddle through the diary. When Harry, Ron, Ginny, Lockhart, and Fawkes triumphantly returned to Minerva McGonagall's office, Harry explained everything that had happened including the diary's possession of Ginny to Dumbledore.[6]
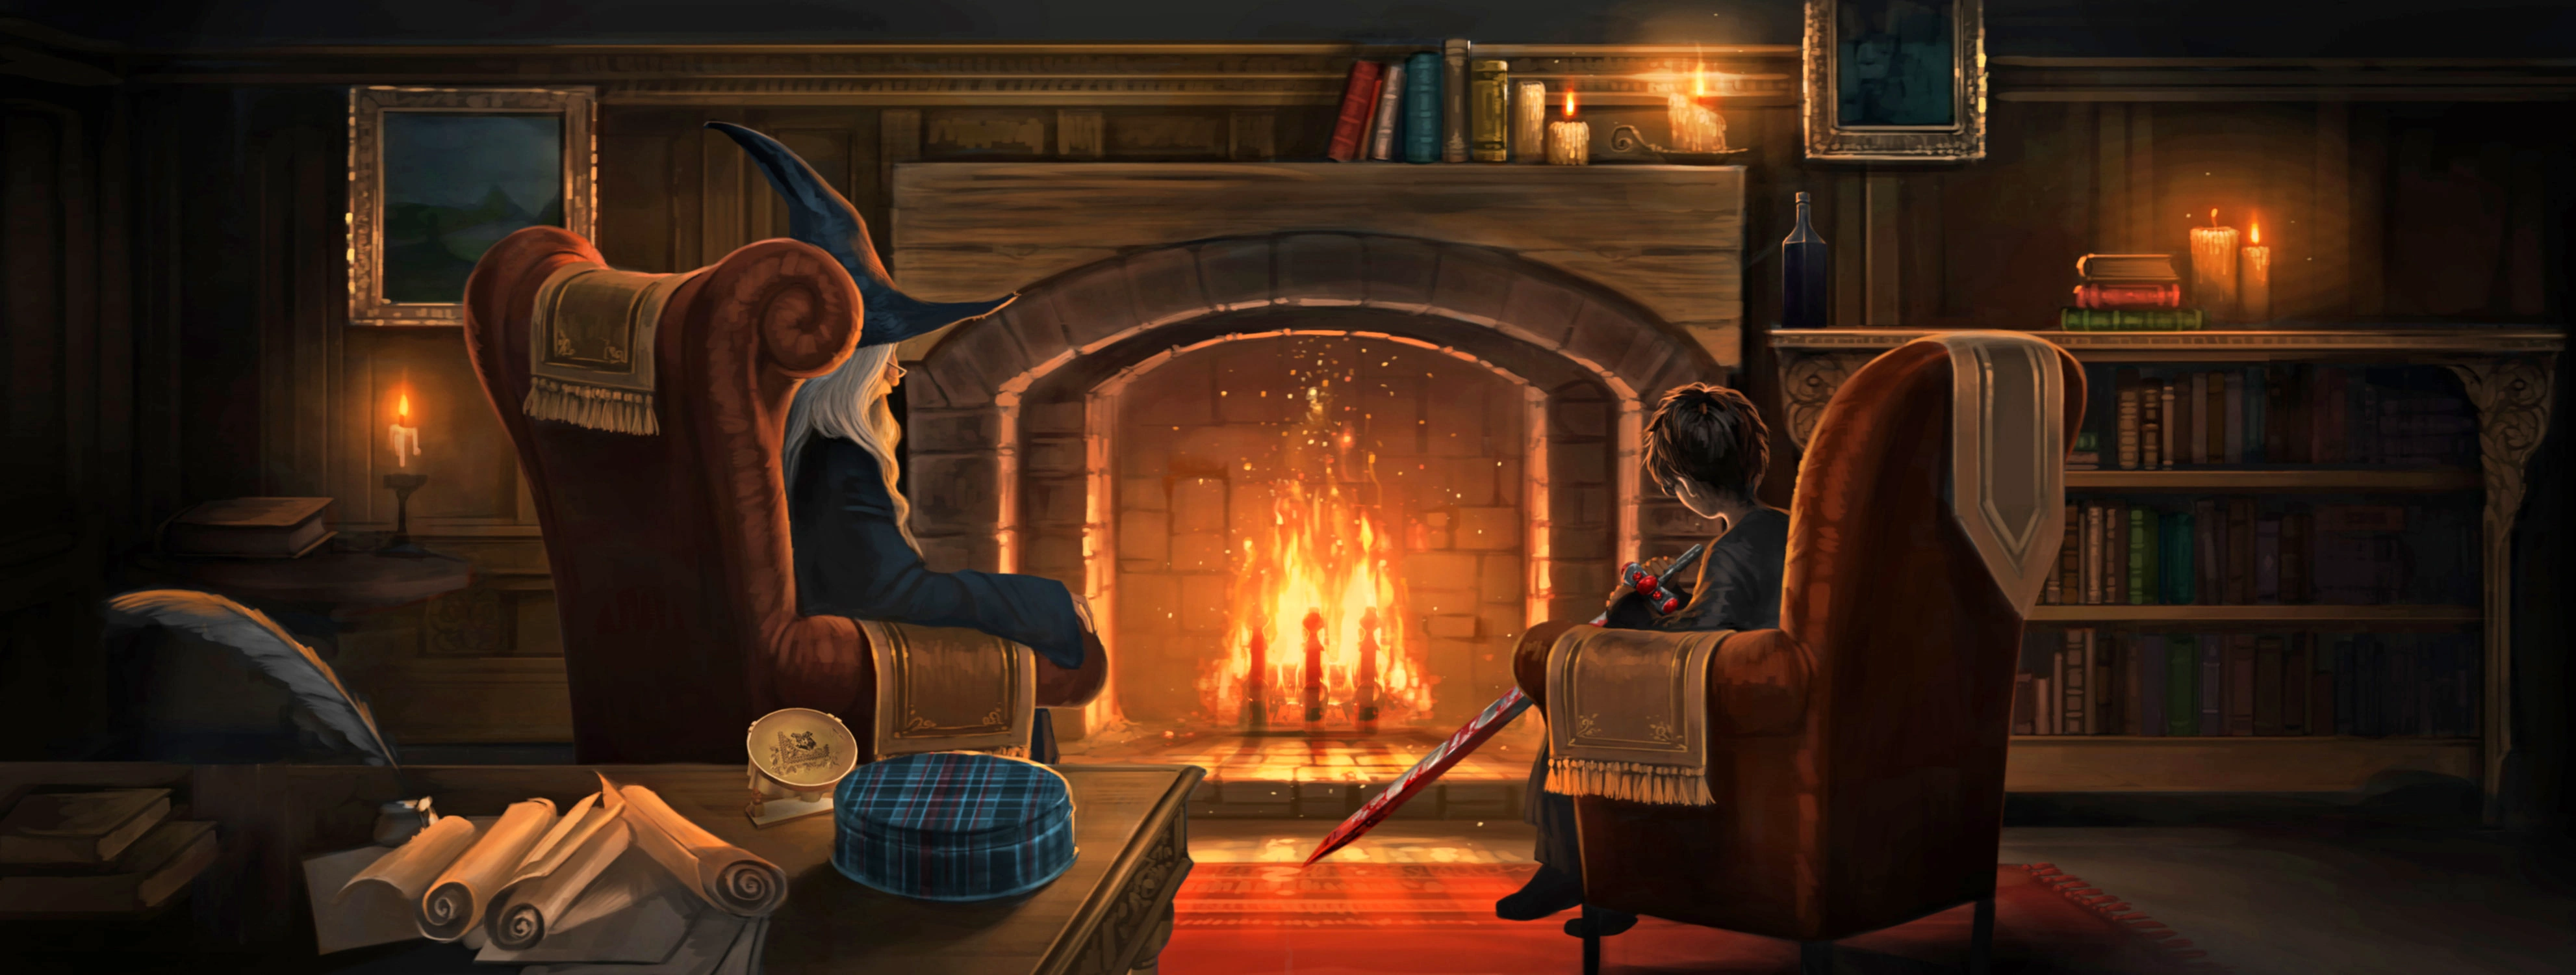

Harry Potter and Dumbledore discussing the events
Harry's description of the events and the diary's part in said events piqued Dumbledore's interest. He had been suspicious of Voldemort's experiments with dark magic for years. After years of careful consideration, Dumbledore had come to the conclusion that Voldemort had created Horcruxes to ensure his immortality, but he had no proof. When Harry brought the diary to Dumbledore, he thought he finally had the evidence to confirm his theory. What troubled Dumbledore most of all was the lax nature of the diary's security. As it contained a part of Voldemort's soul, Dumbledore thought that it should have been hidden and not recklessly thrown into danger, risking its destruction. He came to the conclusion that Voldemort must have created more than one Horcrux, but once again he had no proof.[1]
Destruction of Marvolo Gaunt's Ring
- "I was tempted."
- — Albus Dumbledore on why he put on Gaunt's ring[src]
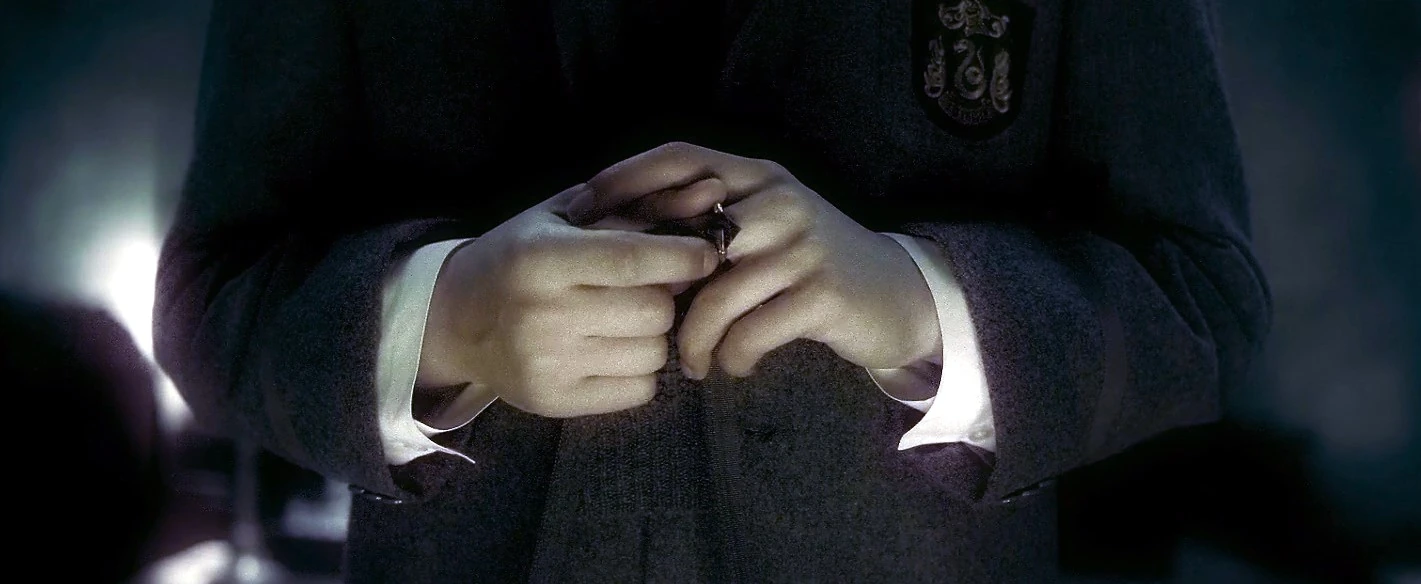

Teenage Tom Riddle (Lord Voldemort) with the ring
Having researched Lord Voldemort's life and heritage, Albus Dumbledore noted a ring worn by Lord Voldemort's maternal grandfather, Marvolo Gaunt.[7] Through the many memories he had collected concerning Voldemort, he discovered that the ring passed to Morfin Gaunt. When he sought out Morfin, he retrieved a memory showing Tom Riddle's discovery of his Gaunt and Muggle heritage. Dumbledore noted that the ring was missing after Morfin's encounter with his nephew.[8] From further research of Tom Riddle's childhood, Dumbledore knew that Riddle liked to collect trophies and surmised that he had likely stolen the ring. As an object of particular meaning to Riddle, Dumbledore thought that Voldemort had likely turned it into one of his very first Horcruxes.
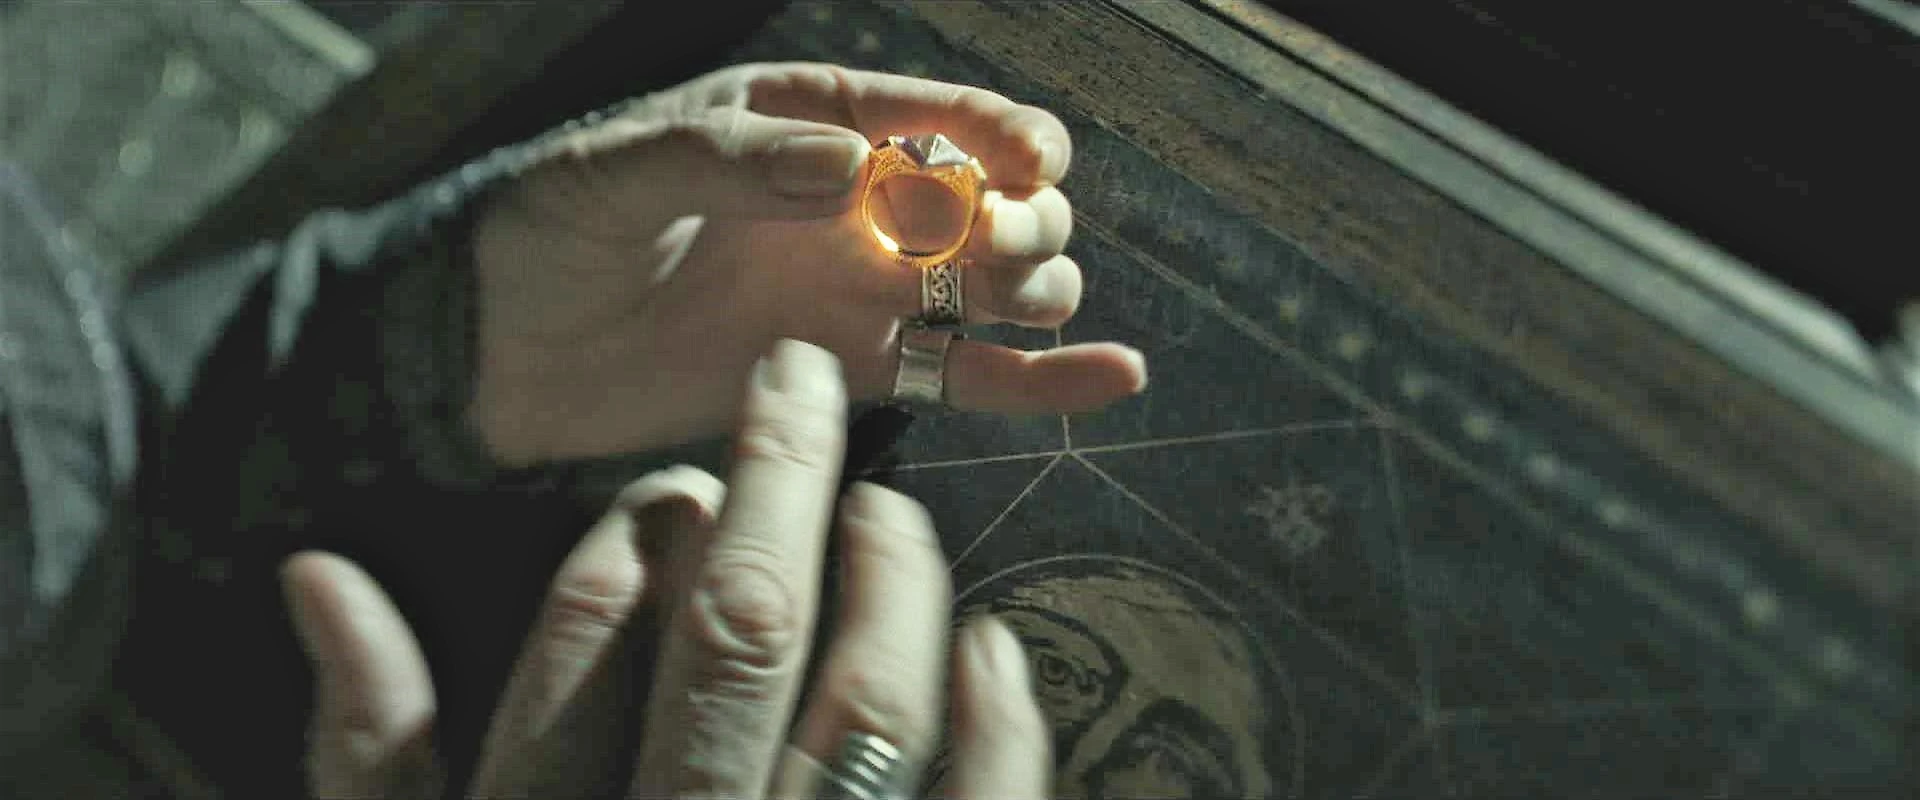

Albus Dumbledore with Marvolo Gaunt's Ring
In the summer of 1996, Albus Dumbledore searched for the ring. He discovered it concealed in the Gaunt shack.[1] In the ring was set a stone that Marvolo Gaunt stated bore the "Peverell coat of arms".[7] The stone set in the ring was, in fact, the Resurrection Stone of Deathly Hallows fame. Upon seeing the stone, Dumbledore put on the ring in hopes of once again seeing his dead family, forgetting that it was a Horcrux.[2] The ring contained a deadly curse, which Dumbledore only managed to keep at bay due to his extreme skill.
Dumbledore destroyed the horcrux with Godric Gryffindor's Sword as it was able to destroy horcruxes as it contained Basilisk venom that had become attached when Harry killed the Basilisk, but to his surprise the curse was not eliminated. Dumbledore contacted Severus Snape who was able to trap the curse in Dumbledore's hand using a number of spells and potions. However, Severus Snape and Dumbledore found out that the curse would spread throughout his body and kill him in a year's time. Because of this, he told Severus Snape to mercifully end his life before he was in pain.
Harry's search for the Horcruxes
Background information
- "I spend time with Harry because I have things to discuss with him, information I must give him before it is too late."
- — Dumbledore explains his private lessons with Harry to Severus Snape[src]


Dumbledore showing Harry a memory of Tom Riddle's past
During the 1996–1997 school year, Dumbledore began to share his findings regarding Voldemort's Horcruxes with Harry Potter.[7] Using the Pensieve, he showed Harry a series of memories about the boy who was Tom Riddle and the man who was Voldemort. During these lessons, Dumbledore taught Harry about the behaviours and psychology of Voldemort hoping to impart a thorough understanding of the man upon Harry. In January 1997, Dumbledore showed Harry a memory of Tom Riddle meeting with the his Potions Master, Horace Slughorn who had recently returned to Hogwarts from retirement. The memory became cloudy, and Slughorn's voice boomed out of nowhere.[8]


Harry retrieving the real memory from Slughorn
When they returned from the Pensieve, Dumbledore told Harry that the memory had been falsified and gave Harry the mission of obtaining the true memory. Months later when Harry did obtain the real memory, he and Dumbledore had an impromptu lesson well after midnight.[1] They discovered that Riddle asked Slughorn if it were possible to split one's soul into seven pieces. Following this shocking revelation, Harry and Dumbledore discussed some of the objects that may be Horcruxes. From the memories they had watched, they deduced that in addition to the two Horcruxes already destroyed there were four more. They also thought that they possibly were Salazar Slytherin's Locket, Helga Hufflepuff's Cup, an object that belonged to either Ravenclaw or Gryffindor, and Nagini.[1]
Slytherin's Locket
Attempt to get the locket
- Albus Dumbledore: "If I tell to to leave me and save yourself, you will do as I tell you?"
- Harry Potter: "I —"
- Albus Dumbledore: "Harry?"
- Harry Potter: "Yes, Sir."
- — Albus Dumbledore to Harry Potter, before leaving Hogwarts[src]
In June, Dumbledore and Harry ventured to a cave by the sea searching for a Horcrux.[9] Dumbledore thought that this cave was a likely place to hide a Horcrux, since it was remote, hard to reach, and a scene where Tom Riddle had harmed two of his fellow orphans at the orphanage. Once inside, the defences set by Voldemort began to act against them. First, a payment of blood was expected to gain entrance to the cave.[9] Upon entering, they were confronted with a vast black lake but saw a green misty light shining from what appeared to be an island in the middle.


R.A.B.'s fake locket
After a failed attempt at summoning the Horcrux by Harry, Dumbledore detected an invisible boat in the water and raised it. Dumbledore and Harry discussed the defences while on the boat and saw that the lake was full of Inferi that were lying peacefully in the water. Dumbledore told Harry that the best weapon against inferi was fire, as they can't stand light and warmth. When they reached the island in the centre, they saw that the green glow was emanating from a potion in a basin.
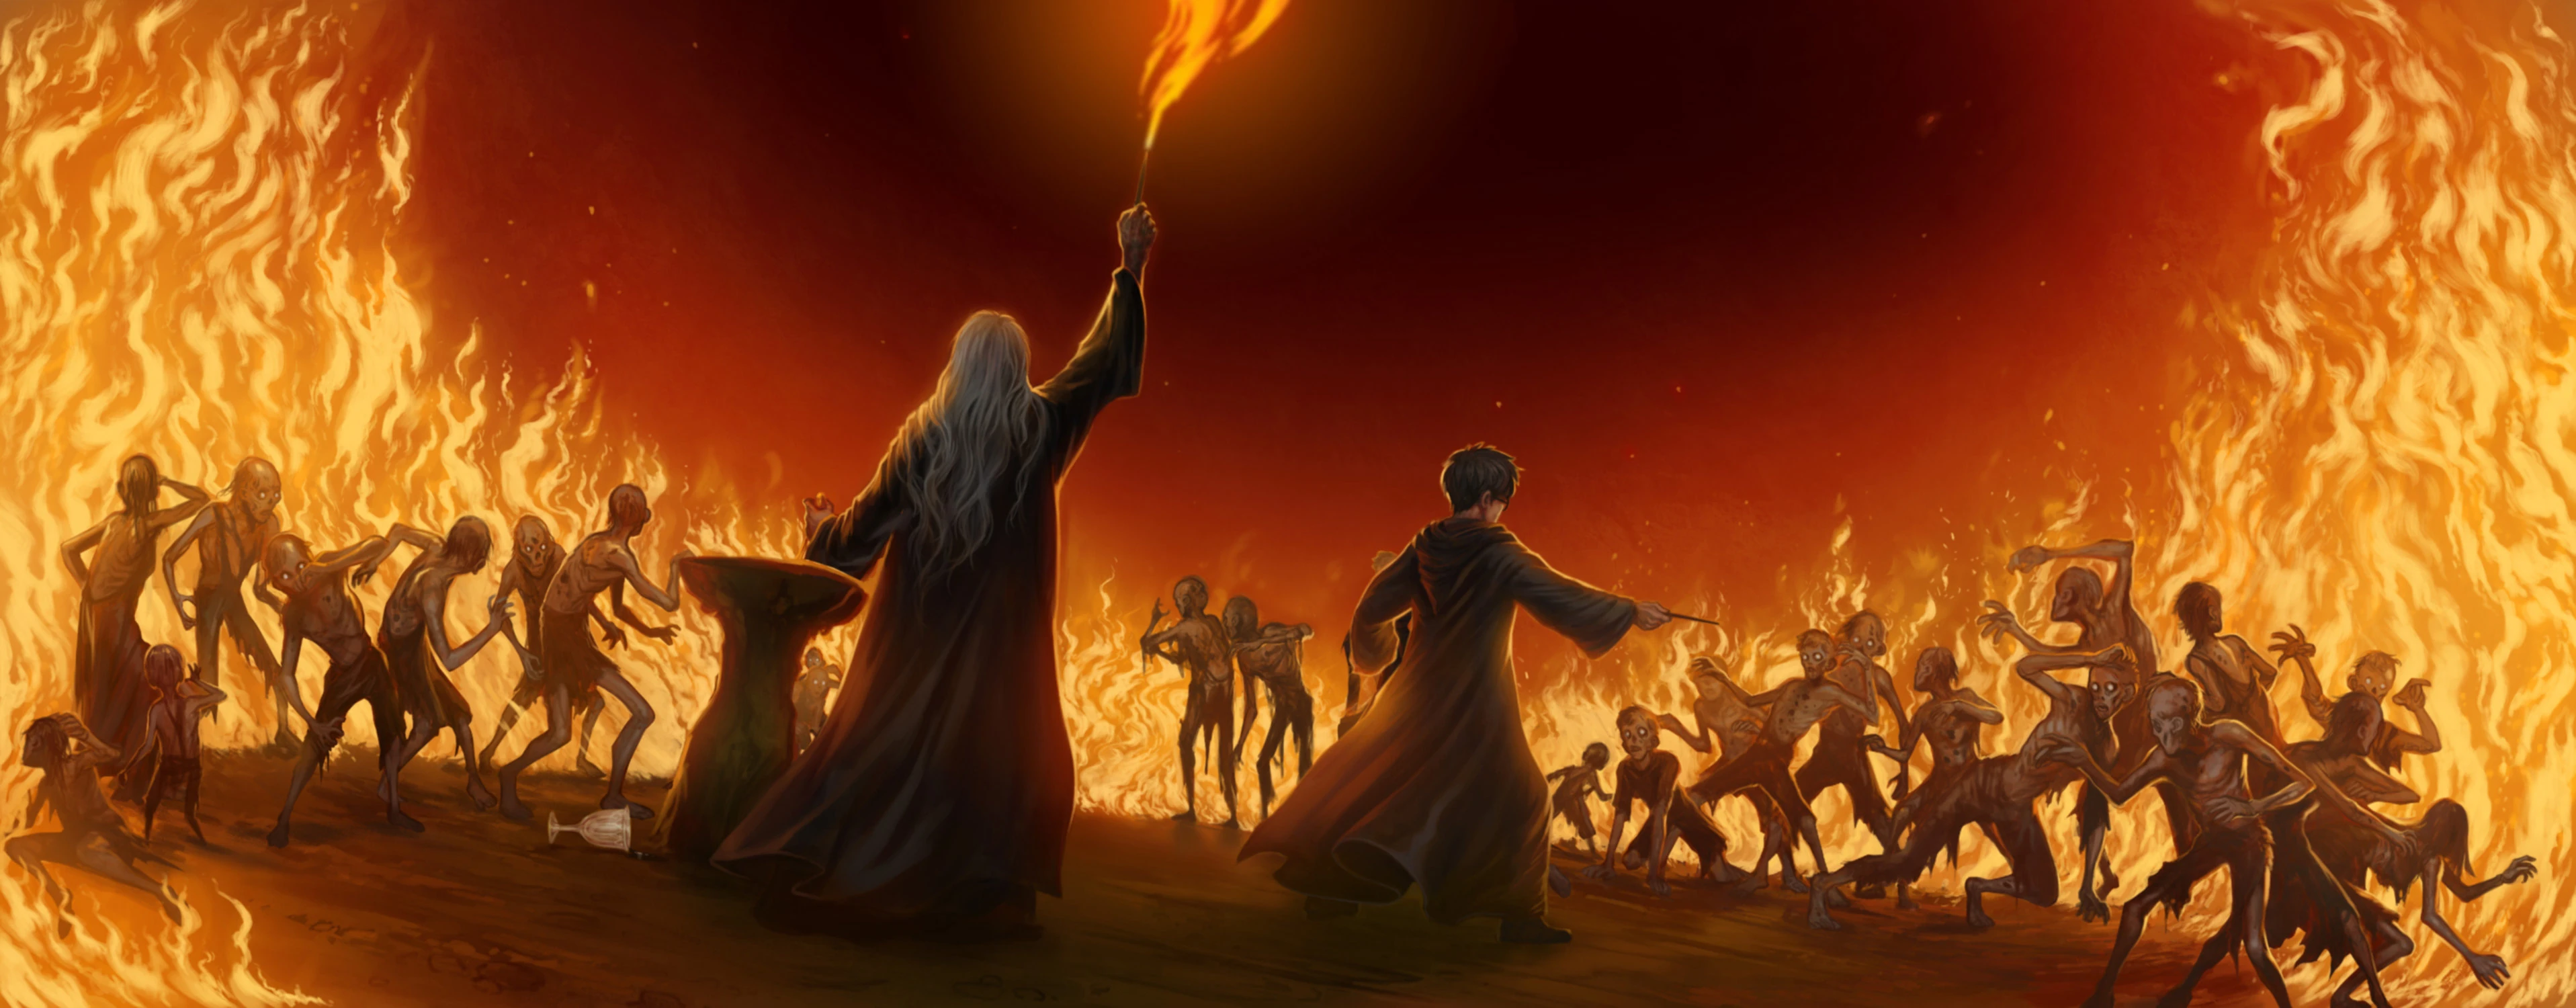

Dumbledore holding back Inferi with a ring of fire
After trying countless magical methods of removing the potion, Dumbledore decided that the only way to get rid of the potion was to drink it.[9] He began drinking, but he could not finish it as the potion was causing him great pain. As agreed, Harry forced the rest of the potion down his Headmaster's throat. Once the basin was empty, Dumbledore asked for water, and Harry attempted to conjure some, but he was unable to give it to Dumbledore as it kept disappearing.[9] Realising that the only way to get water would be from the lake, Harry ran down to the edge and filled the goblet with water.
He returned to Dumbledore and splashed it all over his face and mouth, but noted that he felt a cold grip on his arm that was an inferius. Disturbing the water woke the masses of Inferi. Harry attempted to fight them off but forgot about Dumbledore's earlier command to use fire. Just as he was being dragged towards the water to drown, he was saved by an incredibly weakened Dumbledore. They took the locket from the basin and proceeded out of the cave managing to keep the ring of fire around the boat to ward off the corpses.[9]

Hermione and Harry reading RAB's note
After the Battle of the Astronomy Tower and Dumbledore's death, Harry discovered the locket was a fake. The real Horcrux had been taken by a mysterious person who called himself "R.A.B." He was distraught at this news, believing that Dumbledore had weakened himself for nothing and that he had died in vain.[10] Harry decided that he had been taught about the Horcruxes for a reason and resolved to continue Dumbledore's work.
When he told Ron and Hermione, with whom he had shared everything Dumbledore had taught him, that he was going to drop out of Hogwarts, Ron and Hermione volunteered to join him on his mission.[11] They spent time during the summer of 1997 researching R.A.B., but they could find no leads.[12] After the Ministry had fallen, Harry, Ron, and Hermione escaped to 12 Grimmauld Place. On their first morning there, Harry discovered the identity of R.A.B.[13]
Reclaiming of the locket
- "And she pulled the locket out of the pocket of her robes and handed it to Ron. It was as large as a chicken's egg. An ornate letter S, inlaid with many small green stones, glinted dully in the diffused light shining through the tent's canvas roof."
- — The trio reclaim the locket after breaking into the Ministry[src]
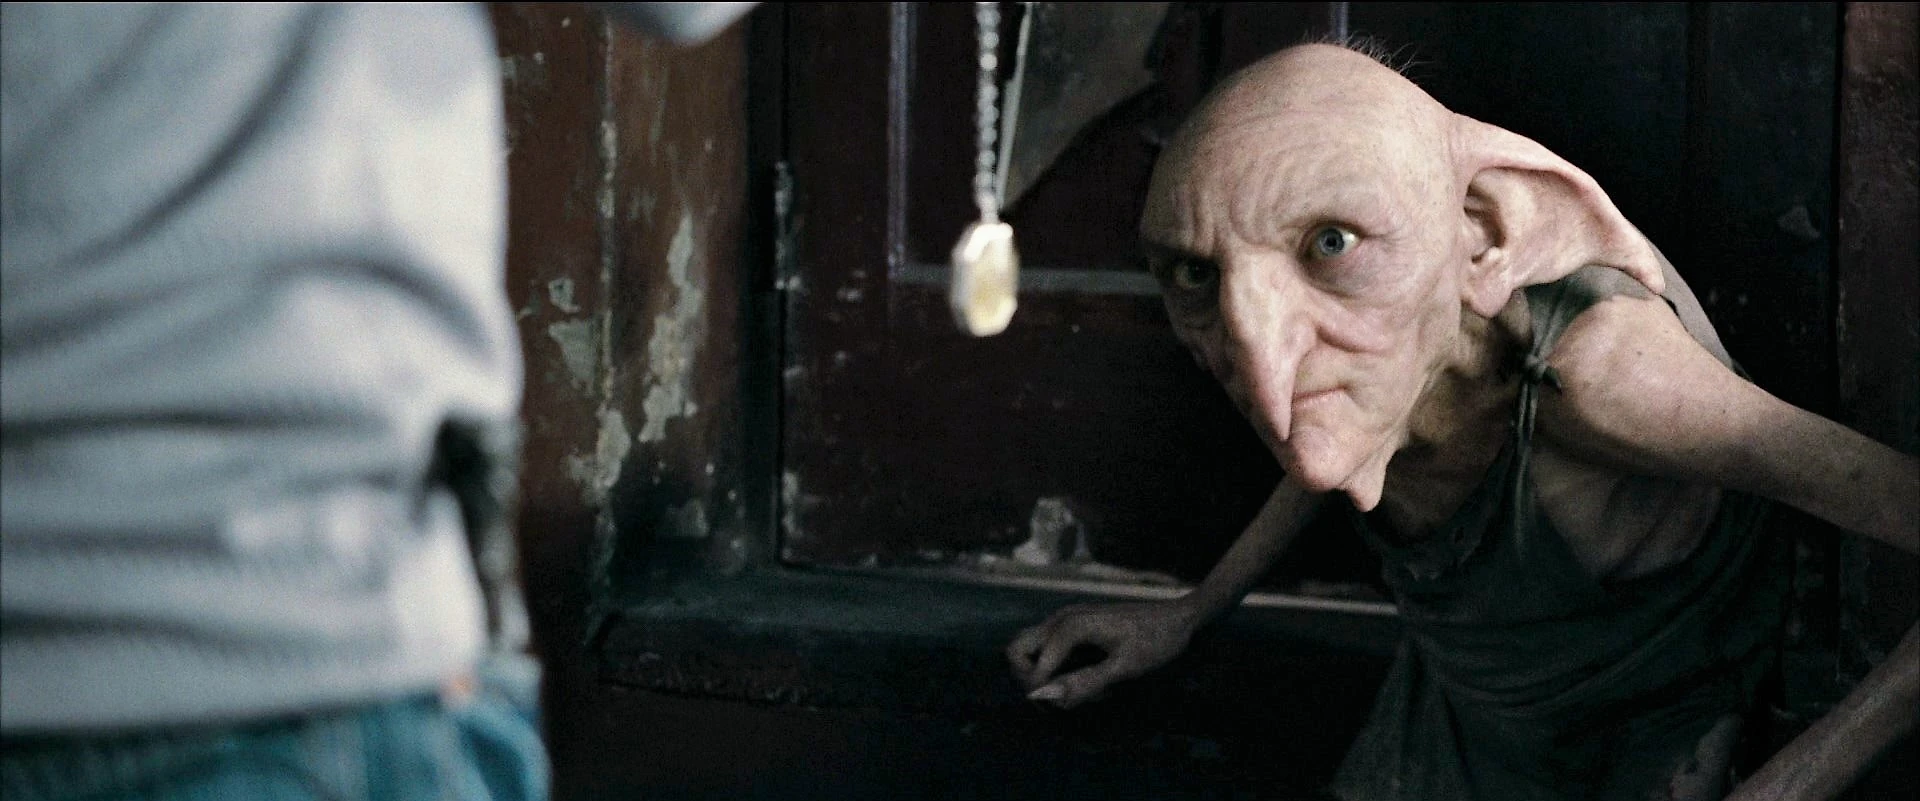

Harry interrogating Kreacher in regards to the real locket
He had been Regulus Black, Sirius Black's younger brother. He had joined the Death Eaters, but backed out and was killed.[13] After searching the house, Hermione realised that the locket had been amongst the items they trashed two summers previous. Harry remembered that Kreacher had throughout that summer been stealing family heirlooms to protect them. He summoned Kreacher and asked about the locket.
Kreacher told them the tale of Regulus's break from the Death Eaters.[13] He told them that he had tried to destroy the locket, but could not and that it had been stolen from the house by Mundungus Fletcher. Harry dispatched Kreacher to find Mundungus. Three days later, Kreacher returned with Fletcher in tow. Fletcher told them that the locket had been taken from him by "some Ministry hag", who resembled a toad.[14] After hearing Mundungus's description, Harry, Ron, and Hermione knew that Dolores Umbridge was in possession of the locket.
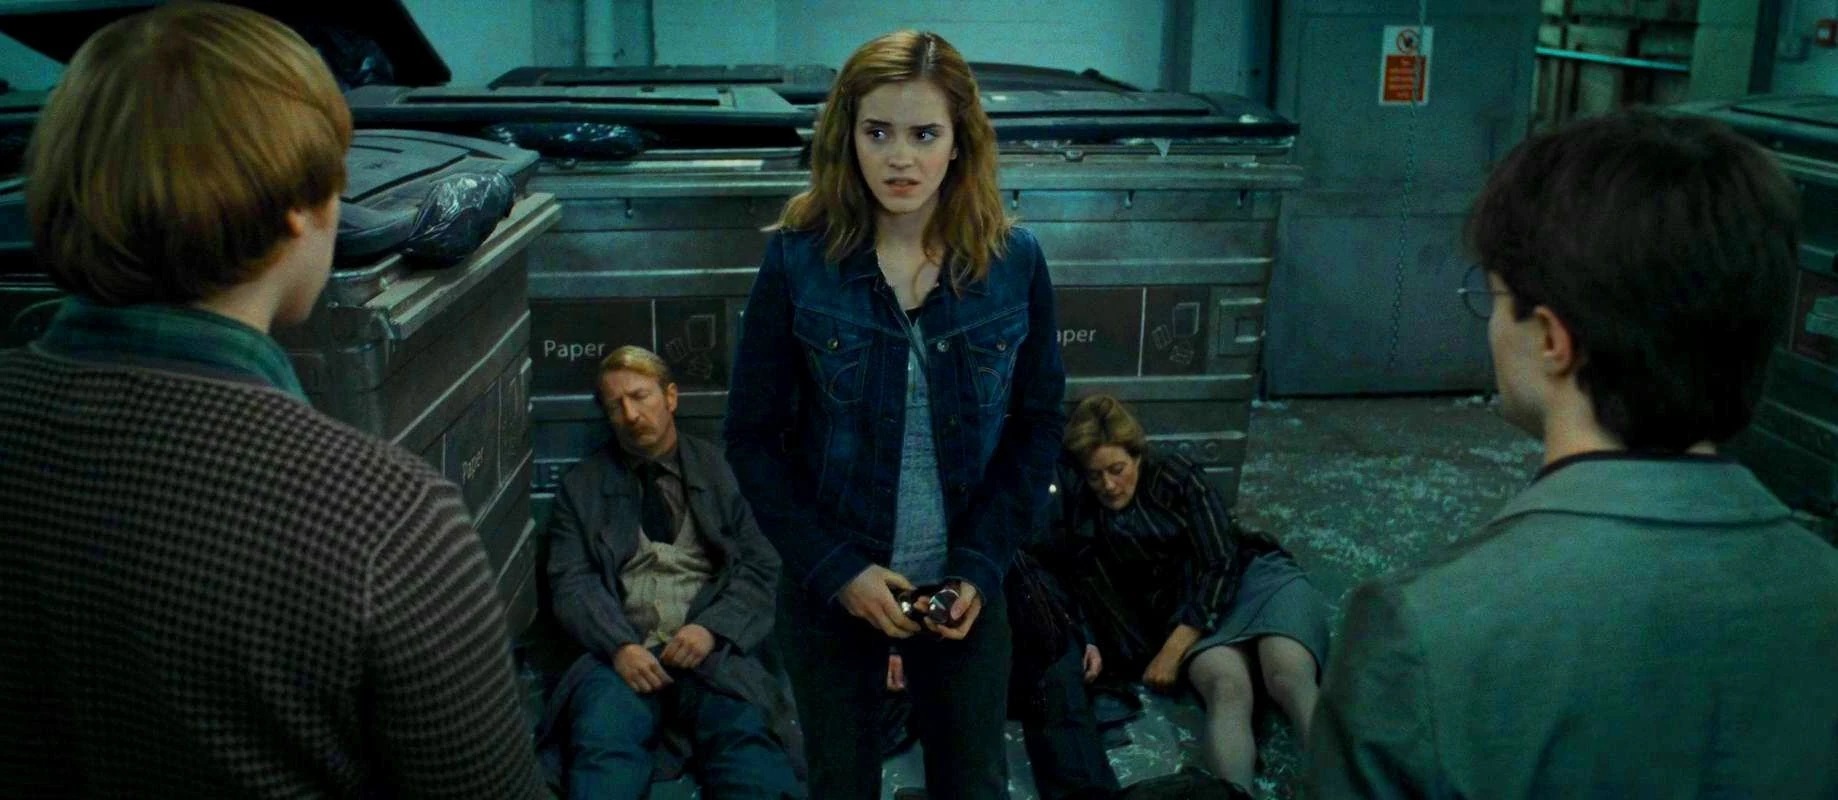
The trio grabbed Reg Cattermole, Albert Runcorn, and Mafalda Hopkirk and plucked out a strand of their hair
After coming to this chilling realisation, Harry, Ron, and Hermione set to planning.[15] They decided to break into the Ministry of Magic and retrieve the locket from Umbridge in person. After a month of planning and careful observation underneath the Invisibility Cloak, they decided the time was right.[15] On 2 September, Harry (disguised as Albert Runcorn), Ron (disguised as Reginald Cattermole), and Hermione (disguised as Mafalda Hopkirk) infiltrated the Ministry of Magic.
The trio soon became separated as Cattermole was needed to stop the rain in Yaxley's office, and Mafalda was dispatched to the Muggle-Born Registration Commission as the stenographer.[15] Harry, now on his own, came to the realisation that their plan had been quite ill conceived, because they had made no contingency for being separated or in fact planned anything once they were inside. Under the Cloak of Invisibility, he ventured to Umbridge's office to search it. He did not find the Horcrux, but he did find Alastor Moody's magical eye on her door. He stole the eye and set off to find Umbridge and Hermione.[16]
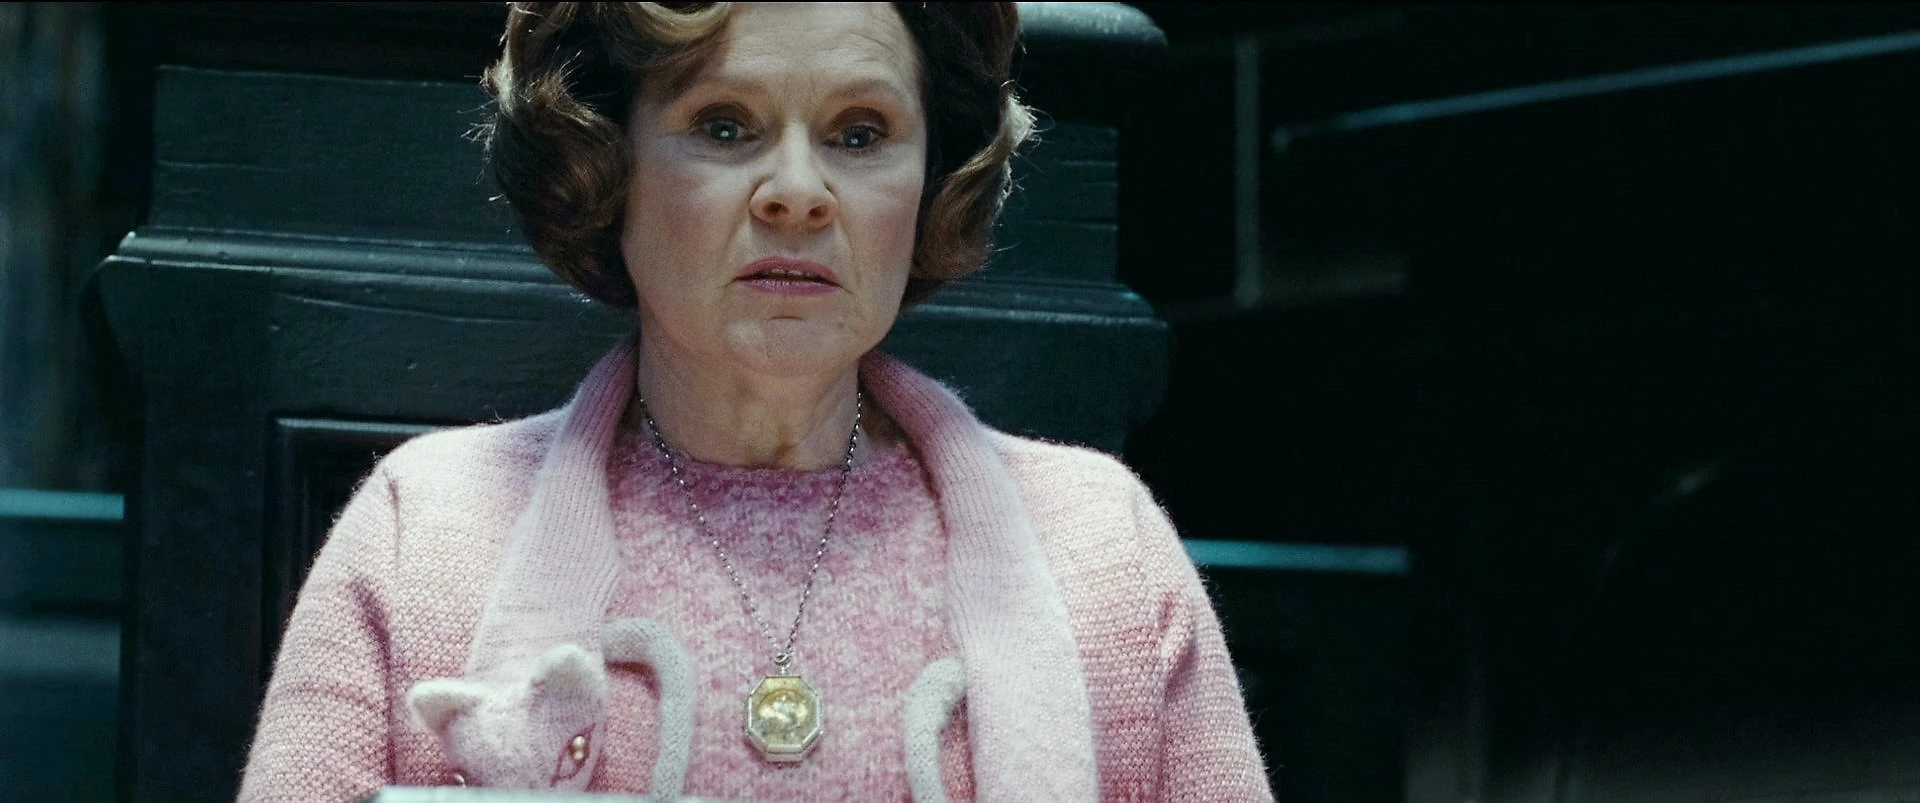

Umbridge wearing the locket while interrogating Muggle-borns
In the courtrooms downstairs, Hermione was witnessing, in fact participating in, the oppression of Muggle-born wizards and witches, who were being stripped of their wands and rights. Once she had been joined by Harry, who remained underneath the Invisibility Cloak, she convinced Umbridge to reveal the locket. When Harry was enraged by Umbridge's comments about her "pure-blood" heritage, he attacked her and Yaxley.[16] In the fracas, Hermione pocketed the Horcrux and replaced it with a copy.
He and Hermione used Patronuses to drive the Dementors back and ushered the Muggle-borns awaiting trial out to the Atrium, where they were instructed to flee with their families. Out in the Atrium, Harry and Hermione met up with Ron and made their escape, but only after revealing the location of 12 Grimmauld Place to Yaxley.[16]
Destruction of the locket
After escaping the Ministry of Magic, Harry, Ron, and Hermione had the Horcrux, but no means with which to destroy it. They spent months on the run and passed the locket between them in order to keep it safe. As they were good people, the locket had a visibly bad effect on the trio.[17] This was the opposite of what Harry witnessed with Umbridge.

Harry being attacked by Nagini while in Bathilda Bagshot's cottage
The locket caused them to become moody and bicker over petty things like cooking. Some time in the fall, the trio overheard another group of fugitives talking. It was revealed by the goblins Griphook and Gornuk that the sword in the Lestrange Vault was in fact a fake. At this, Harry and Hermione surmised that Gryffindor's sword was impregnated with Basilisk venom and that it could destroy Horcruxes.[17] Hearing their excitement drove Ron, who was wearing the locket, over the edge. Ron exclaimed that they had discovered yet another object that they would have to search for and he abandoned his friends in a rage of fury and jealousy after having an intense row with Harry.[17]
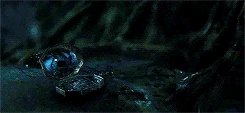
Ron Weasley destroying a Horcrux with the Sword of Gryffindor
After Harry and Hermione's disastrous journey to Godric's Hollow, they camped in the Forest of Dean.[18] They discussed Harry's broken wand, and Ron heard his name through the Deluminator bequeathed to him by Dumbledore. Using the Deluminator, he returned in time to save Harry from drowning in a frozen pond. Harry had followed a mysterious Patronus into the night and found the Sword of Gryffindor.[18] When he tried to retrieve the sword, the locket which he was still wearing attempted to kill him. Ron pulled him and the sword out of the pond. Harry understood that Ron must destroy the locket since he had retrieved the sword. After a battle with the locket's energy in which Ron's greatest fears were played upon by the locket, Ron destroyed the locket with the sword and returned to his friends.[18]
Skirmish at Malfoy Manor
- Hermione Granger: "Are you saying there's a Horcrux in the Lestranges' vault?"
- Harry Potter: "Yes, Bellatrix was terrified when she thought we'd been in there, she was beside herself. Why? What did she think we'd seen, what else did she think we might have taken? Something she was petrified You-Know-Who would find out about."
- — Harry explains how he deduced the location of the Horcrux[src]


Bellatrix at Malfoy Manor after the trio was caught by Snatchers
When the locket had been destroyed Harry, Ron, and Hermione were once again lost for new leads. They spent the next few months listlessly journeying through the countryside in a vain search for more clues.[19] It was not until around Easter that they found anything substantive. After listening to a pirate radio broadcast, Potterwatch, Harry broke the Taboo on Voldemort's name.[19] The trio were captured by Snatchers and brought to Malfoy Manor. Their identities were confirmed, and Lucius Malfoy was about to summon the Dark Lord to the residence, but he was stopped by Bellatrix Lestrange. She saw Gryffindor's sword and assumed that the trio had broken into her Gringotts vault and became almost hysterical.[20]
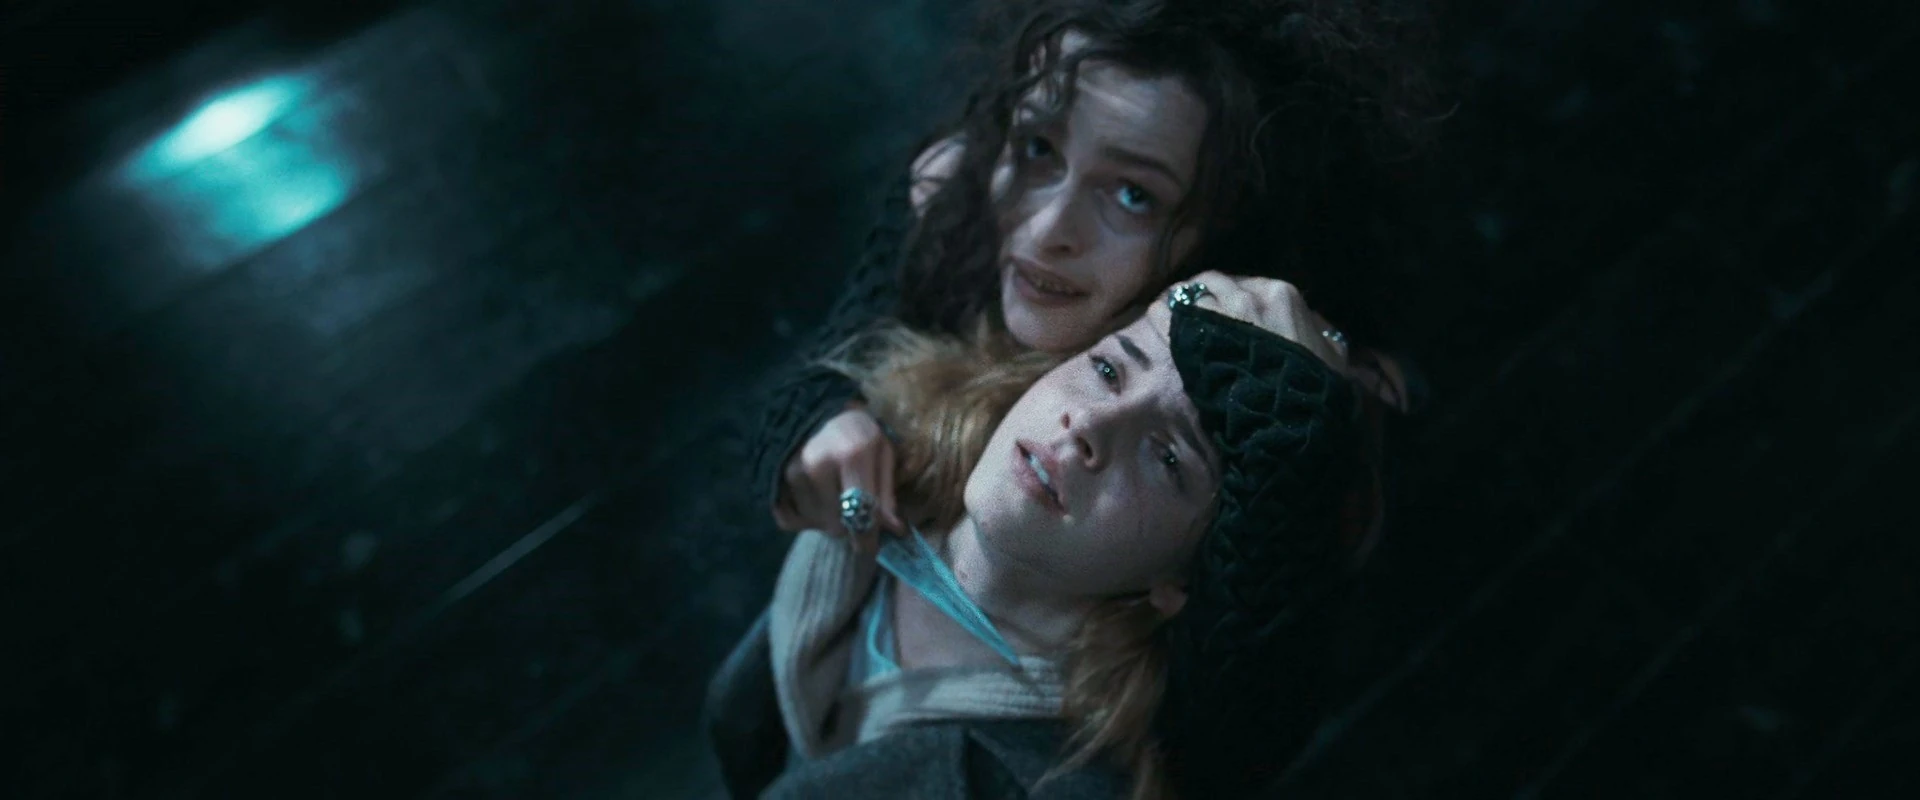

Bellatrix threatening to kill Hermione after torturing her
Bellatrix then separated Hermione for interrogation while the others were locked in the cellar with the other prisoners. In a blind panic, Harry scrambled in his bag for the shard of mirror and called out for help, and Dobby soon appeared in the cellar.[20] With Dobby's help, Harry managed to orchestrate their escape. In the ensuing skirmish, Ron saved Hermione while Harry defeated Draco Malfoy and took many wands from him.[20] Unfortunately, Dobby was killed in the escape. While overcome with grief for Dobby, Harry dug his grave and thought about the events of the day. He came to the conclusion that Voldemort had asked Bellatrix to store one of his Horcruxes at Gringotts Wizarding Bank.[21]
Break-into Gringotts Wizarding Bank
- "Remember the cup's small and gold, it's got a badger engraved on it, two handles —"
- — Harry Potter describing the cup[src]
After escaping Malfoy Manor to the safe haven of Shell Cottage, owned by Bill and Fleur, Harry negotiated with the goblin Griphook to break into the Lestrange vault, where he believed there might be a Horcrux. Griphook agreed, but only if Harry would give him Gryffindor's sword. Harry, reluctantly, conceded.[21] The next month was spent planning the heist. They decided to use what was left of their store of Polyjuice Potion to transform Hermione into Bellatrix. Since they had her real wand, Harry thought the disguise would be pretty convincing.[22] Ron was to be transfigured into a foreign wizard they called "Dragomir Despard."[23] Harry and Griphook went under the Cloak of Invisibility.

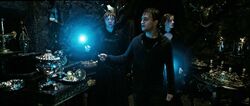
The trio in the Lestrange vault looking for the cup
Arriving on Diagon Alley, they were promptly joined by Travers, another Death Eater, who began asking too many questions to be comfortable with. However, they managed to escape Travers and get inside the Lestrange vault, but Harry had to perform the Imperius Curse multiple times to ensure their access without being noticed. Unfortunately, they were detected, and their covers blown.[23] Once inside they discovered that the treasure had been protected with Geminio and Flagrante spells. Harry found Hufflepuff's cup in the vault and was able to obtain it, but they had to escape on a Ukrainian Ironbelly, when Griphook took the sword and abandoned them.[23]
Battle of Hogwarts
- "I know that you are preparing to fight. Your efforts are futile. You cannot fight me. I do not want to kill you. I have great respect for the teachers of Hogwarts. I do not want to spill magical blood. Give me Harry Potter, and none shall be harmed. Give me Harry Potter, and I shall leave the school untouched. Give me Harry Potter, and you will be rewarded. You have until midnight."
- — Lord Voldemort's ultimatum leading up to the final battle[src]

Battle of Hogwarts
Harry had a vision soon after the Gringotts break-in. He saw the locations of all the Horcruxes.[24] He was vindicated in the eyes of Ron and Hermione when he discovered that Hogwarts was the home of one of the Horcruxes. This was an idea he had been pushing for months.
The trio decided to go to Hogsmeade immediately to gain entrance to the castle. They found a passage from the Hog's Head to the Room of Requirement.[25]
Search for the Diadem
- "Voldemort thought I'd go to Ravenclaw Tower. There it was: a solid fact, the place to start. Voldemort had stationed Alecto Carrow in the Ravenclaw common room, and there could only be one explanation: Voldemort feared that Harry already knew his Horcrux was connected to that House. But the only object anyone seemed to associate with Ravenclaw was the lost diadem... and how could the Horcrux be the diadem? How was it possible that Voldemort, the Slytherin, had found the diadem that had eluded generations of Ravenclaws? Who could have told him where to look, when nobody had seen the diadem in living memory?"
- — Harry Potter deducing the location of Ravenclaw's Diadem[src]
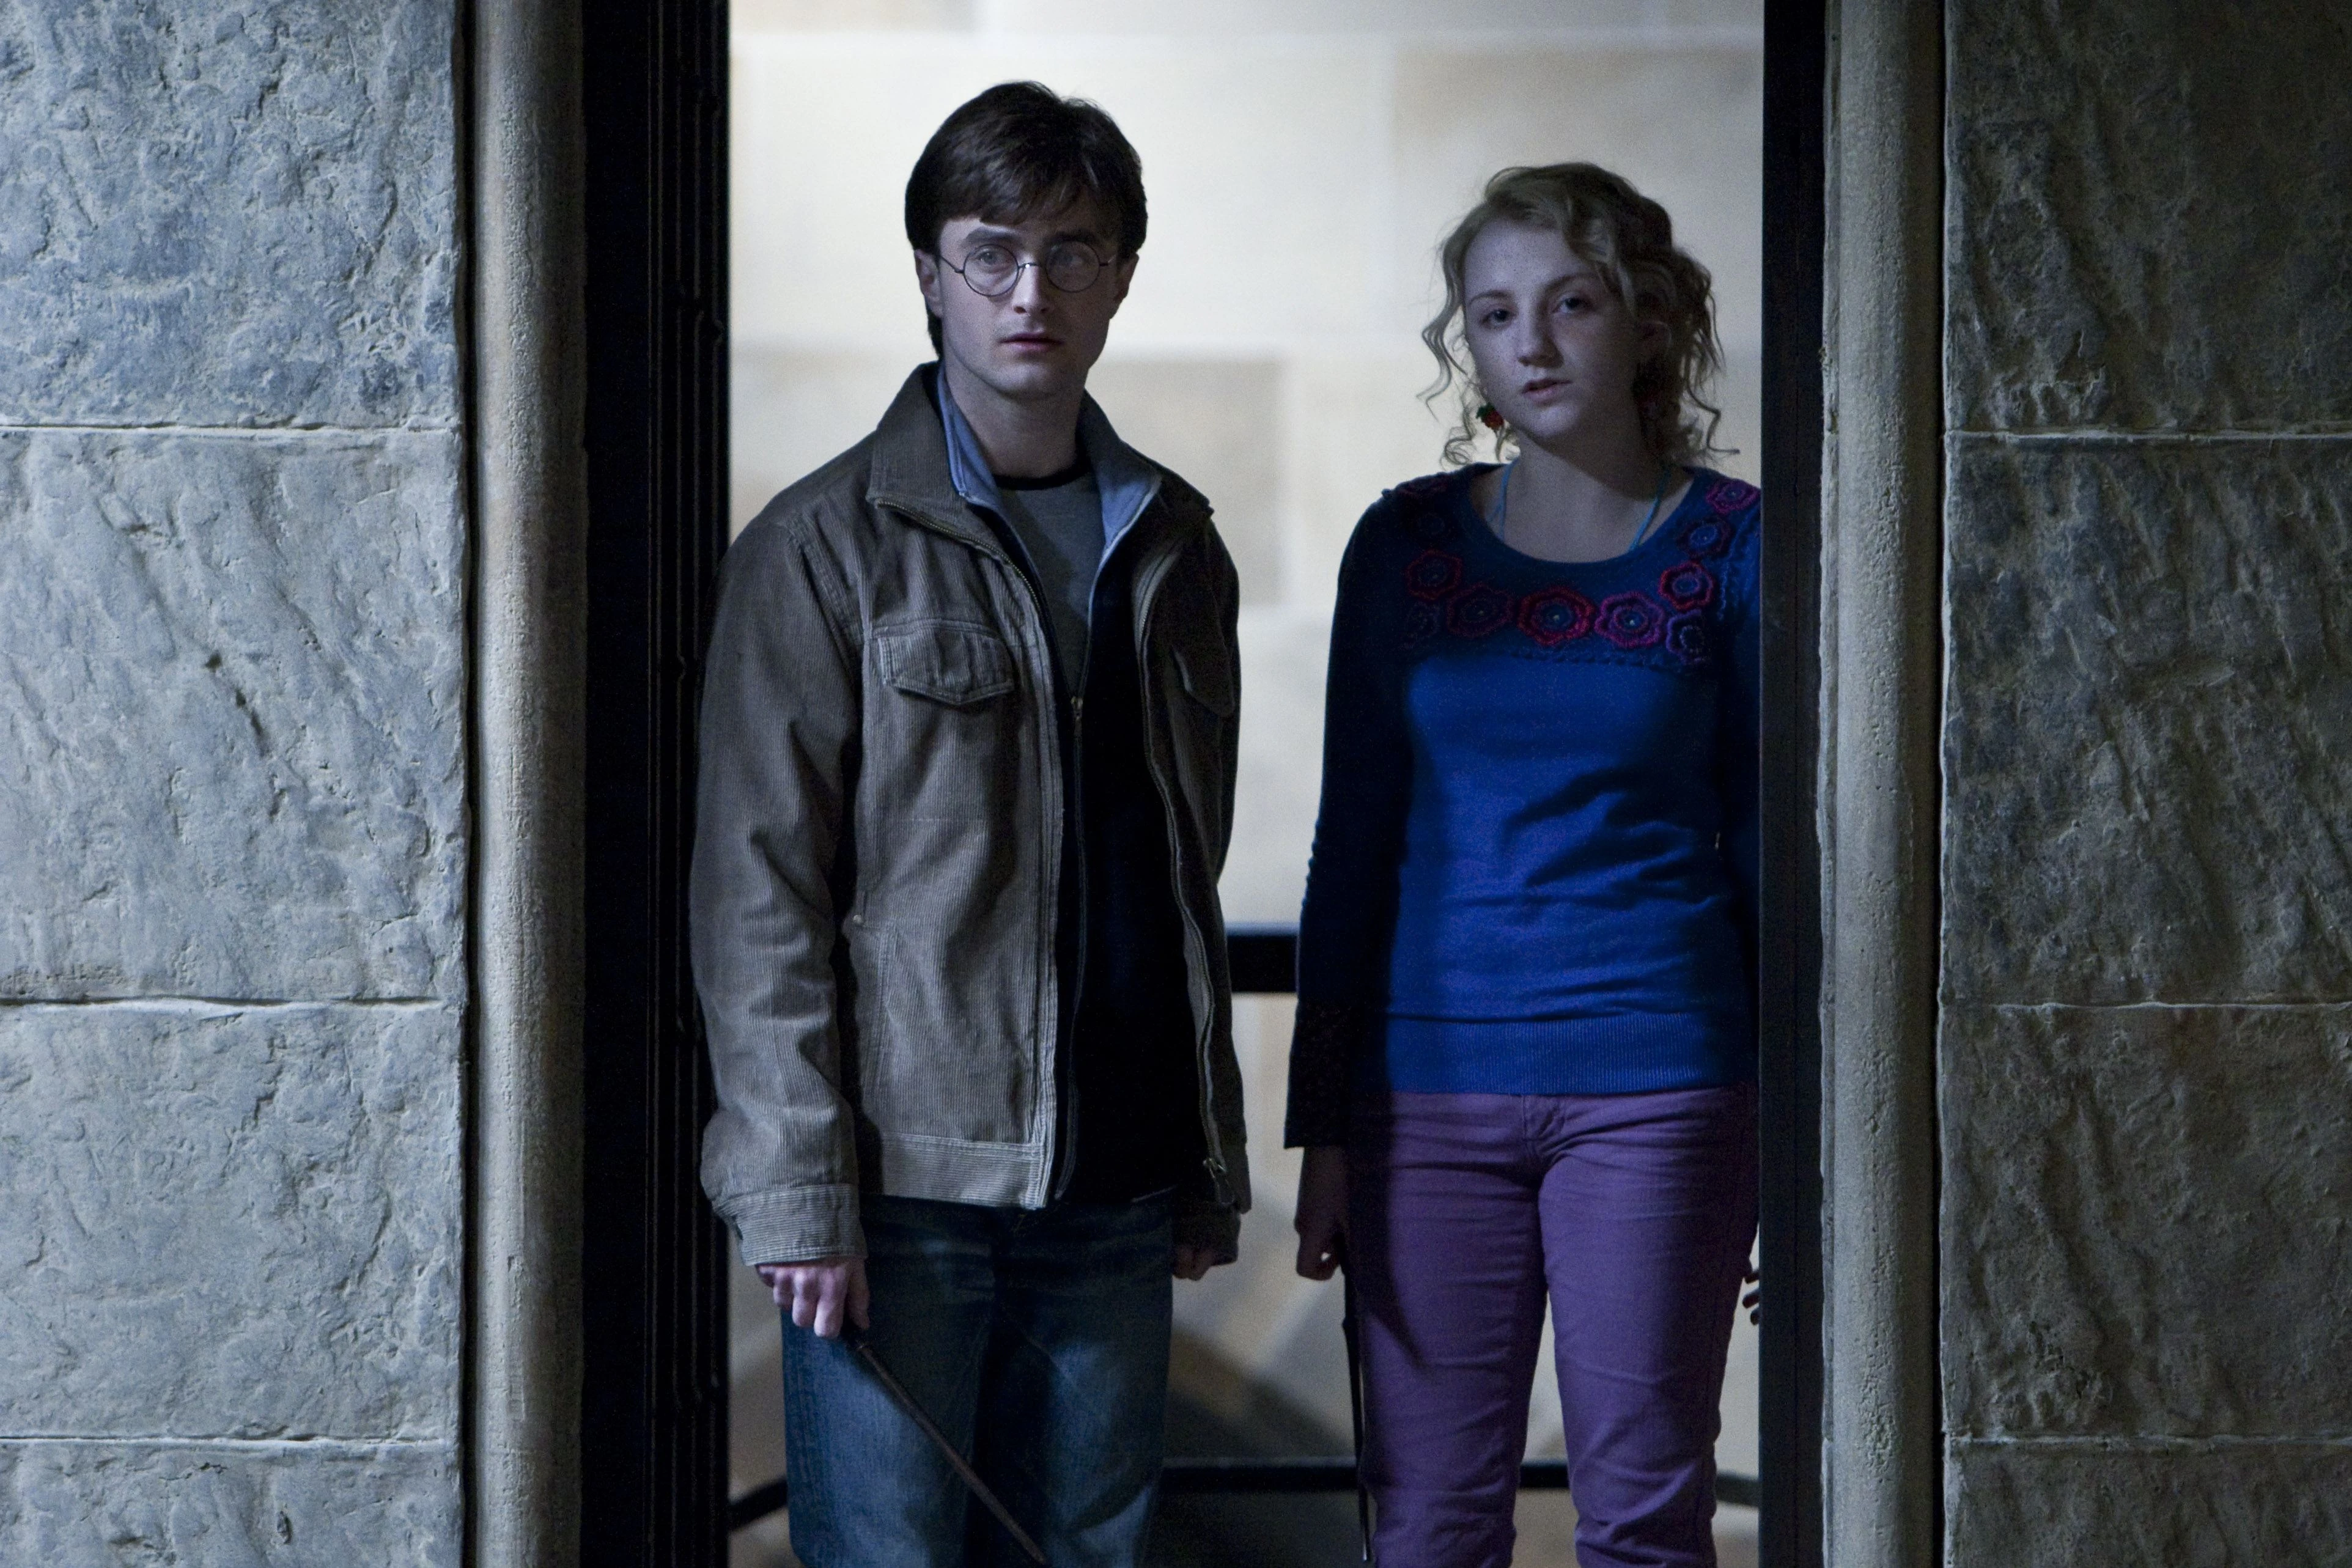

Harry and Luna entering Ravenclaw Tower
Upon entrance to the castle, Harry set off with Luna Lovegood to see what Ravenclaw's diadem looked like, while Ron and Hermione, unbeknownst to Harry, went to the Chamber of Secrets. There was a bust of the diadem in the common room of Ravenclaw Tower.[26] They went under the Invisibility Cloak, and when they reached the door, Harry found out that a riddle had to be answered to gain entrance to the common room. Thankfully, Luna was able to answer the riddle and Harry left the safety of the cloak to get a better look at the diadem.
He was surprised by Alecto Carrow, who pressed her Dark Mark.[26] Luna then stunned Carrow, and Harry hid back underneath the cloak. Amycus Carrow and Minerva McGonagall entered the common room and found Alecto passed out on the ground. They argued about what to do. When Amycus spat in McGonagall's face, Harry used the Cruciatus Curse on him until he passed out. Harry then left with McGonagall as she prepared the castle for the coming siege.[27]
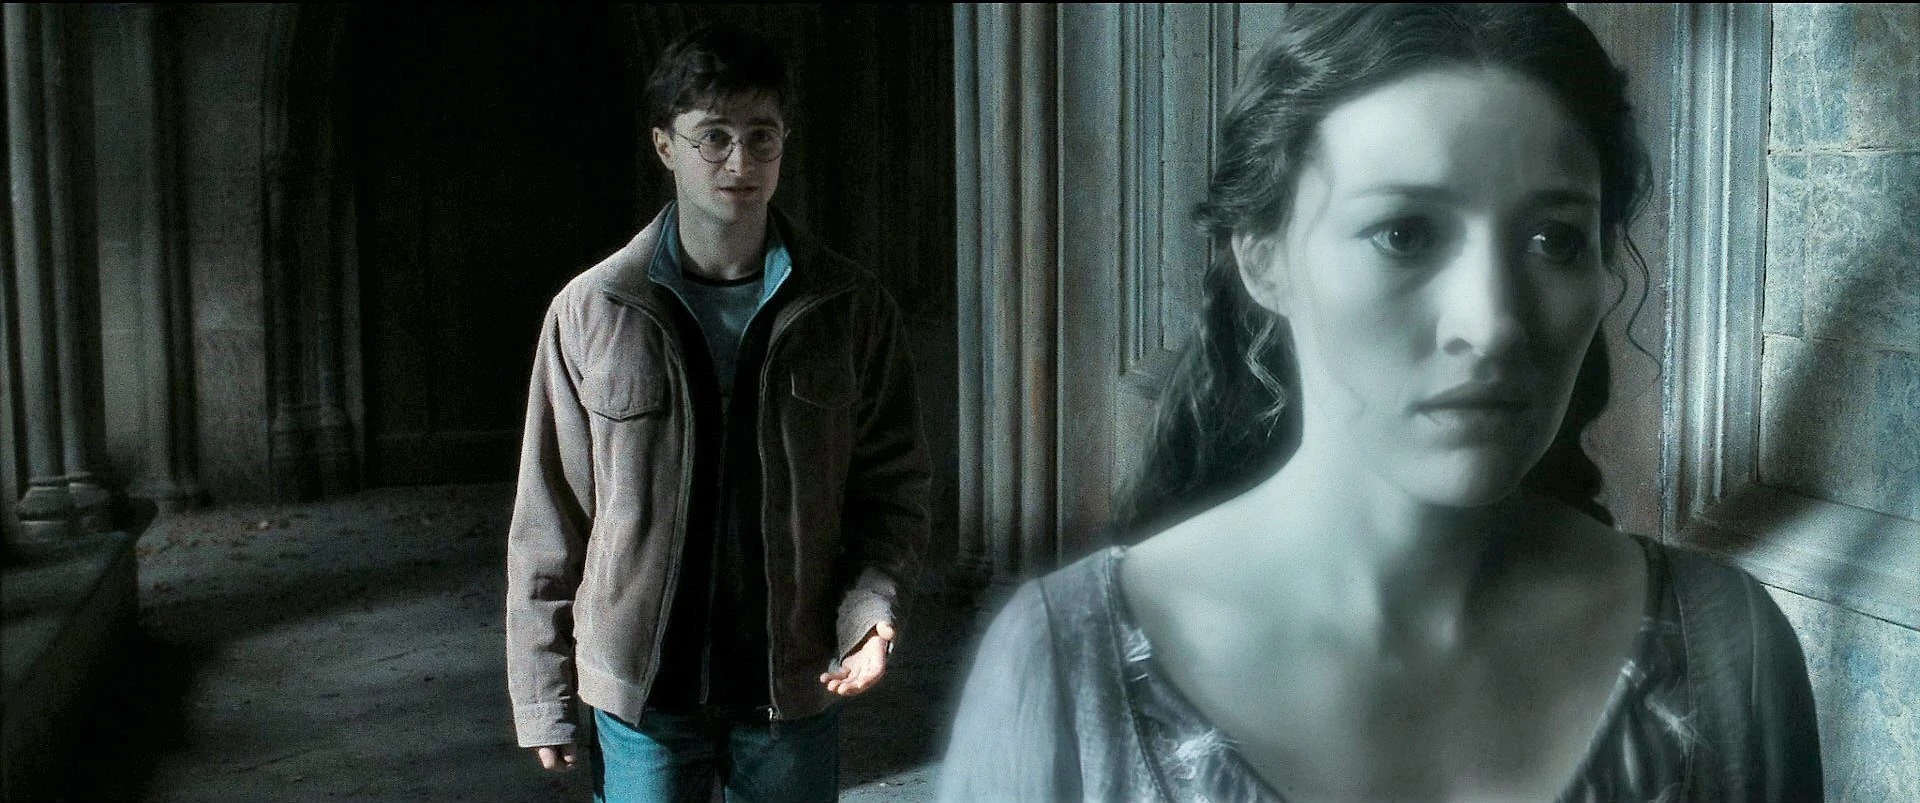

Helena Ravenclaw telling Harry her history with the diadem
In his search for Ron and Hermione, Harry ran into Nearly Headless Nick. At this, he realised that the Grey Lady might know about the diadem.[28] When he found her, she was initially reluctant to give him information, but in the end she told him that she had stolen the diadem from her mother and that it was left in Albania where she died. She revealed that only once did she tell this story to someone. Harry thought that Riddle had charmed the story out of her.[28] When Harry saw a pair of fallen gargoyles, he had a brain wave. The diadem had been hidden in the Room of Requirement in the same place Harry had hidden the Half-Blood Prince's book.
Destruction of Hufflepuff's Cup
- "So we're another Horcrux down. Hermione stabbed it. Thought she should. She hasn't had the pleasure yet."
- — Hermione Granger destroyed Hufflepuff's Cup with a Basilisk fang[src]
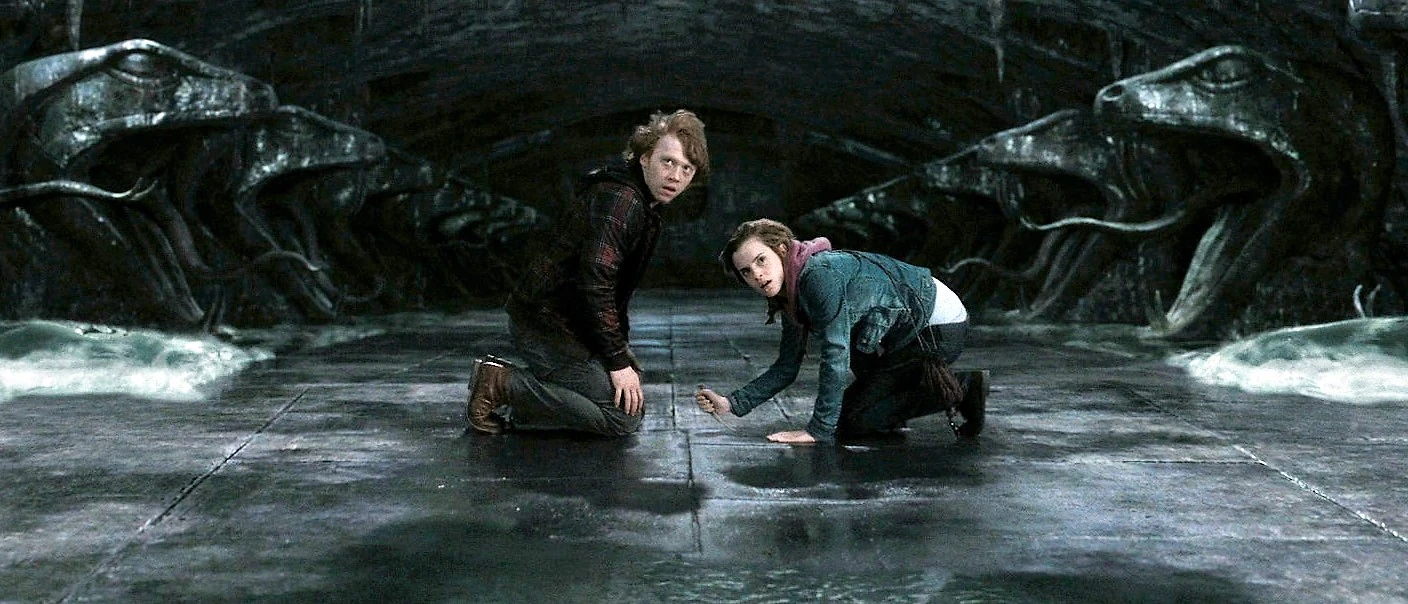

Hermione and Ron destroying the cup while in the Chamber of Secrets
When he reached the Room of Requirement, he found Ron and Hermione and was told that the cup was destroyed. While Harry was searching for the unknown third Horcrux, Ron and Hermione decided to get rid of the cup. They had the inspiration to get Basilisk fangs from the Chamber of Secrets.
Ron was able to imitate Parseltongue, and thus opened the entrance of the Chamber, which was located in the second floor girl's bathroom. Within the main Chamber he and Hermione acquired the fangs from the Basilisk's skeleton. Ron suggested Hermione destroy the Horcrux, as she had not destroyed one yet. Hermione stabbed it, thus destroying it beyond magical repair. After they left the Chamber they reunited with Harry, who was on his way to the Room of Requirement to look for the Diadem.[28]
Skirmish in the Room of Requirement
- "A bloodlike substance, dark and tarry, seemed to be leaking from the diadem. Suddenly Harry felt the thing vibrate violently, then break apart in his hands, and as it did so, he thought he heard the faintest, most distant scream of pain, echoing not from the grounds or the castle, but from the thing that had just fragmented in his fingers."
- — Description of the diadem's destruction[src]
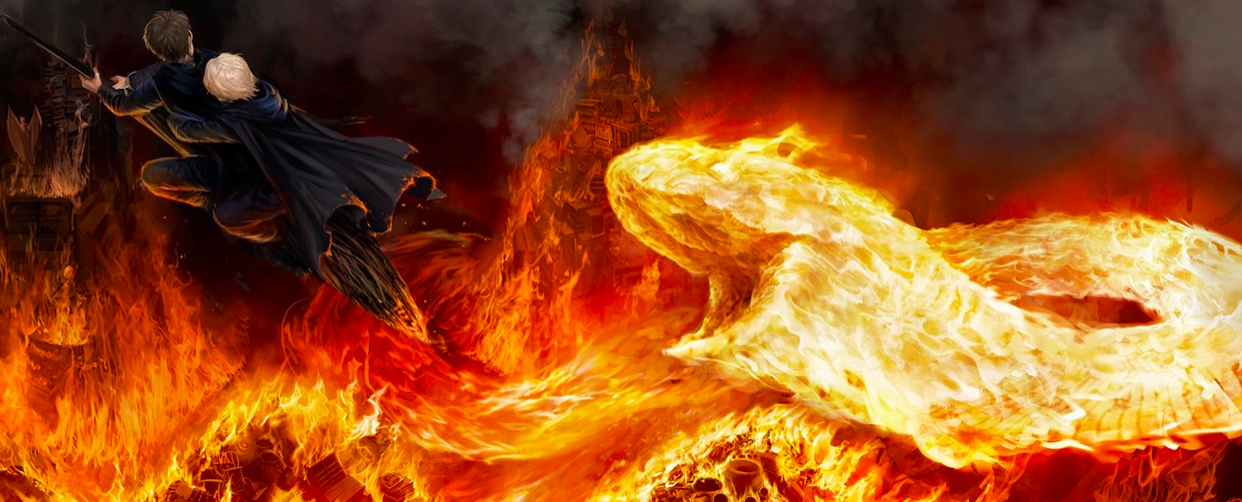
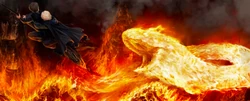
Harry and Malfoy escaping the Fiendfyre in the Room of Requirement
When they all entered the Room of Requirement, they split up to search for the diadem. Harry found it, but before he could get it, he was ambushed by Draco Malfoy, Gregory Goyle, and Vincent Crabbe.[28] During a brief skirmish in which Crabbe and Goyle had aimed to kill, Crabbe used Fiendfyre, but he could not control it. While the trio tried to escape, they found two old brooms. Harry mounted one and Ron and Hermione took the other.
As they were flying away, they saw Malfoy and a hurt Goyle standing in the fire. Harry saved Malfoy and grabbed the diadem as it was falling. They escaped the room and examined the diadem which had been destroyed by the cursed fire.[28] Crabbe had died at the hands of his own curse.
Harry's sacrifice
- "You were the seventh Horcrux, Harry, the Horcrux he never meant to make."
- — Dumbledore and Harry speaking in the limbo about the Horcruxes[src]

Harry willingly letting Voldemort hit him with the Killing Curse
While the battle was still in full swing, Harry, Ron, and Hermione ventured down to the Shrieking Shack. They knew that was where Voldemort was located and believed that Nagini would be with him. After witnessing Nagini kill Severus Snape, Harry collected a string of memories from the dying man.[29] During a one hour ceasefire, Harry discovered that he was an unintended Horcrux from Snape's memories. In order to destroy Voldemort, he had to allow the Dark Lord to kill him. Harry also found out that Severus Snape was loyal to Dumbledore after all, because he had been in love with Harry's mother and that Dumbledore was dying and asked Snape to kill him.[30]
Harry left the castle under his Cloak of Invisibility. Along the way he entrusted Neville Longbottom to kill Nagini. He followed two Death Eaters back to their camp. There, he willingly let Voldemort kill him, fully intending to die.[31] Fortunately, the blood from Harry in Voldemort allowed Harry to survive, while the piece of Voldemort's soul inside him was destroyed.[2]
Slaying of Nagini
- Harry Potter: "You know Voldemort's snake. Neville? He's got a huge snake. Calls it Nagini"
- Neville Longbottom: "I've heard, yeah. What about it?"
- Harry Potter: "It's got to be killed."
- — Harry entrusting Neville with the task of slaying Nagini[src]
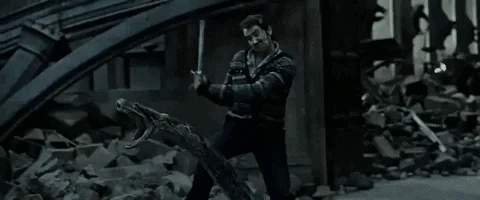
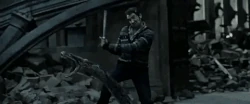
Neville killing Nagini using the Sword of Gryffindor
With Harry feigning death, the Death Eaters marched back to the castle and demanded its surrender. Harry knew that the Horcrux inside him was destroyed, but one Horcrux still remained to be destroyed: Voldemort's enormous serpent, Nagini. The defenders of the castle filed out onto the grounds to face the approaching army. Believing Harry to be dead, Neville Longbottom lunged at Voldemort and swore that he would only join him when "hell freezes over".[32] In response, Voldemort cast a Full Body-Bind Curse on Neville, then placed the Sorting Hat on his head and set it ablaze.
At the same time, the centaurs and other creatures from the Forbidden Forest attacked the Death Eaters. In the chaos, Neville withdrew Gryffindor's sword from the hat and decapitated Nagini, who had been set free of the protection that she had been under earlier.[32] With Nagini dead, all of the Horcruxes had been destroyed.
Voldemort's death
- "There are no more Horcruxes. It's just you and me now, Riddle. Neither can live while the other survives, and one of us is about to leave for good."
- — Harry Potter and Voldemort's final discussion with each other[src]
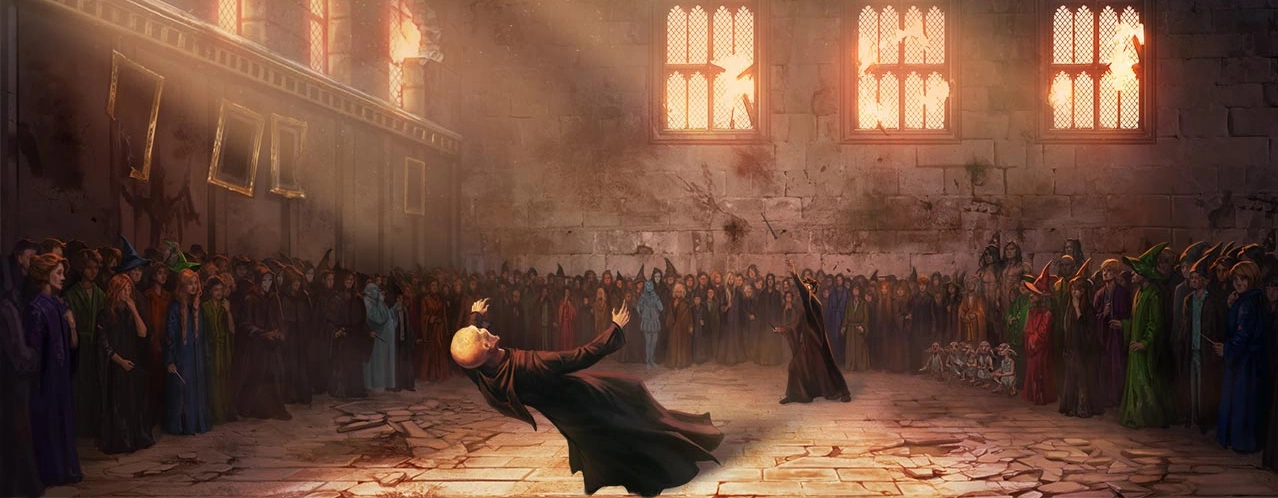

Lord Voldemort being defeated by Harry Potter for the final time
A few minutes later, Harry revealed himself and faced Voldemort. He explained everything to Voldemort - Snape's true loyalty, Dumbledore's plan, and the Elder Wand's true master (first Draco, now Harry himself), and even offered Voldemort the chance for trying to be remorseful, which Voldemort refused. Having been told of his mistakes, Voldemort tried to kill Harry with the Killing Curse once and for all, but all did not go according to plan.
When Voldemort tried to kill Harry with the Elder Wand, Harry's mastery of the Elder Wand (which he obtained earlier by Disarming the previous master, Draco Malfoy) caused the Elder Wand to refuse to harm its true master: the Killing Curse rebounded, the Elder Wand went soaring through the air into Harry's hand, and Voldemort was destroyed once and for all.[32]
Alternate reality
In 2020, Lord Voldemort and Bellatrix Lestrange's daughter Delphini tricked Scorpius Malfoy and Albus Potter into going back in time and preventing the death of Cedric Diggory. Due to Cedric's humiliation during the Second Task of the Triwizard Tournament, he ended up joining the Death Eaters. While most if not all of the rest of the Horcrux hunt likely went the same, Cedric's survival caused one crucial alteration: Cedric killed Neville Longbottom during the Battle of Hogwarts and thus Nagini was never killed.
As a result, Harry was unable to kill Voldemort and was thus killed instead, creating an alternate reality where Voldemort ruled. This reality was negated when Scorpius, with the help of the alternate Hermione Granger, Ron Weasley and Severus Snape, travelled back in time once again and set things right.[33]
See also
Appearances
- Harry Potter and the Chamber of Secrets (First appearance)
- Harry Potter and the Chamber of Secrets (film)
- Harry Potter and the Half-Blood Prince
- Harry Potter and the Half-Blood Prince (film)
- Harry Potter and the Half-Blood Prince (video game)
- Harry Potter and the Deathly Hallows
- Harry Potter and the Deathly Hallows: Part 1
- Harry Potter and the Deathly Hallows: Part 1 (video game)
- Harry Potter and the Deathly Hallows: Part 2
- Harry Potter and the Deathly Hallows: Part 2 (video game)
- LEGO Harry Potter: Years 5-7
- Harry Potter: The Character Vault
- Harry Potter: The Creature Vault
Notes and references
- ↑ 1.0 1.1 1.2 1.3 1.4 1.5 1.6 1.7 Harry Potter and the Half-Blood Prince, Chapter 23 (Horcruxes)
- ↑ 2.0 2.1 2.2 Harry Potter and the Deathly Hallows, Chapter 35 (King's Cross)
- ↑ Harry Potter and the Chamber of Secrets, Chapter 10 (The Rogue Bludger)
- ↑ 4.0 4.1 4.2 Harry Potter and the Chamber of Secrets, Chapter 16 (The Chamber of Secrets)
- ↑ 5.0 5.1 Harry Potter and the Chamber of Secrets, Chapter 17 (The Heir of Slytherin)
- ↑ Harry Potter and the Chamber of Secrets, Chapter 18 (Dobby's Reward)
- ↑ 7.0 7.1 7.2 Harry Potter and the Half-Blood Prince, Chapter 10 (The House of Gaunt)
- ↑ 8.0 8.1 Harry Potter and the Half-Blood Prince, Chapter 17 (A Sluggish Memory)
- ↑ 9.0 9.1 9.2 9.3 9.4 Harry Potter and the Half-Blood Prince, Chapter 26 (The Cave)
- ↑ Harry Potter and the Half-Blood Prince, Chapter 28 (Flight of the Prince)
- ↑ Harry Potter and the Half-Blood Prince, Chapter 30 (The White Tomb)
- ↑ Harry Potter and the Deathly Hallows, Chapter 6 (The Ghoul in Pyjamas)
- ↑ 13.0 13.1 13.2 Harry Potter and the Deathly Hallows, Chapter 10 (Kreacher's Tale)
- ↑ Harry Potter and the Deathly Hallows, Chapter 11 (The Bribe)
- ↑ 15.0 15.1 15.2 Harry Potter and the Deathly Hallows, Chapter 12 (Magic is Might)
- ↑ 16.0 16.1 16.2 Harry Potter and the Deathly Hallows, Chapter 13 (The Muggle-Born Registration Commission)
- ↑ 17.0 17.1 17.2 Harry Potter and the Deathly Hallows, Chapter 15 (The Goblin's Revenge)
- ↑ 18.0 18.1 18.2 Harry Potter and the Deathly Hallows, Chapter 19 (The Silver Doe)
- ↑ 19.0 19.1 Harry Potter and the Deathly Hallows, Chapter 22 (The Deathly Hallows)
- ↑ 20.0 20.1 20.2 Harry Potter and the Deathly Hallows, Chapter 23 (Malfoy Manor)
- ↑ 21.0 21.1 Harry Potter and the Deathly Hallows, Chapter 24 (The Wandmaker)
- ↑ Harry Potter and the Deathly Hallows, Chapter 25 (Shell Cottage)
- ↑ 23.0 23.1 23.2 Harry Potter and the Deathly Hallows, Chapter 26 (Gringotts)
- ↑ Harry Potter and the Deathly Hallows, Chapter 27 (The Final Hiding Place)
- ↑ Harry Potter and the Deathly Hallows, Chapter 28 (The Missing Mirror)
- ↑ 26.0 26.1 Harry Potter and the Deathly Hallows, Chapter 29 (The Lost Diadem)
- ↑ Harry Potter and the Deathly Hallows, Chapter 30 (The Sacking of Severus Snape)
- ↑ 28.0 28.1 28.2 28.3 28.4 Harry Potter and the Deathly Hallows, Chapter 31 (The Battle of Hogwarts)
- ↑ Harry Potter and the Deathly Hallows, Chapter 32 (The Elder Wand)
- ↑ Harry Potter and the Deathly Hallows, Chapter 33 (The Prince's Tale)
- ↑ Harry Potter and the Deathly Hallows, Chapter 34 (The Forest Again)
- ↑ 32.0 32.1 32.2 Harry Potter and the Deathly Hallows, Chapter 36 (The Flaw in the Plan)
- ↑ Harry Potter and the Cursed Child